


User Guide
HappyWired Customer Support Portal
1. Portal Overview
The HappyWired Customer Service Portal is a central hub for managing and tracking ongoing support cases. It is designed to give full visibility of support activity in one place.
This user guide is always subject to change, you may find that some sections do not 100% reflect the current state of the portal.
2. Registration
Access to the portal is by invitation only. You will receive an invitation email from HappyWired before you can register. There is no need to create a username or password for the portal itself, authentication is handled entirely through an external identity provider.
2.1 Receiving Your Invitation
HappyWired will send a portal invitation to the email address held on your contact record. The email contains a registration link.

Click the link to be taken directly to the registration page.
If you have not received an invitation email, check your junk or spam folder first. If it is not there, contact HappyWired to request a new invitation.
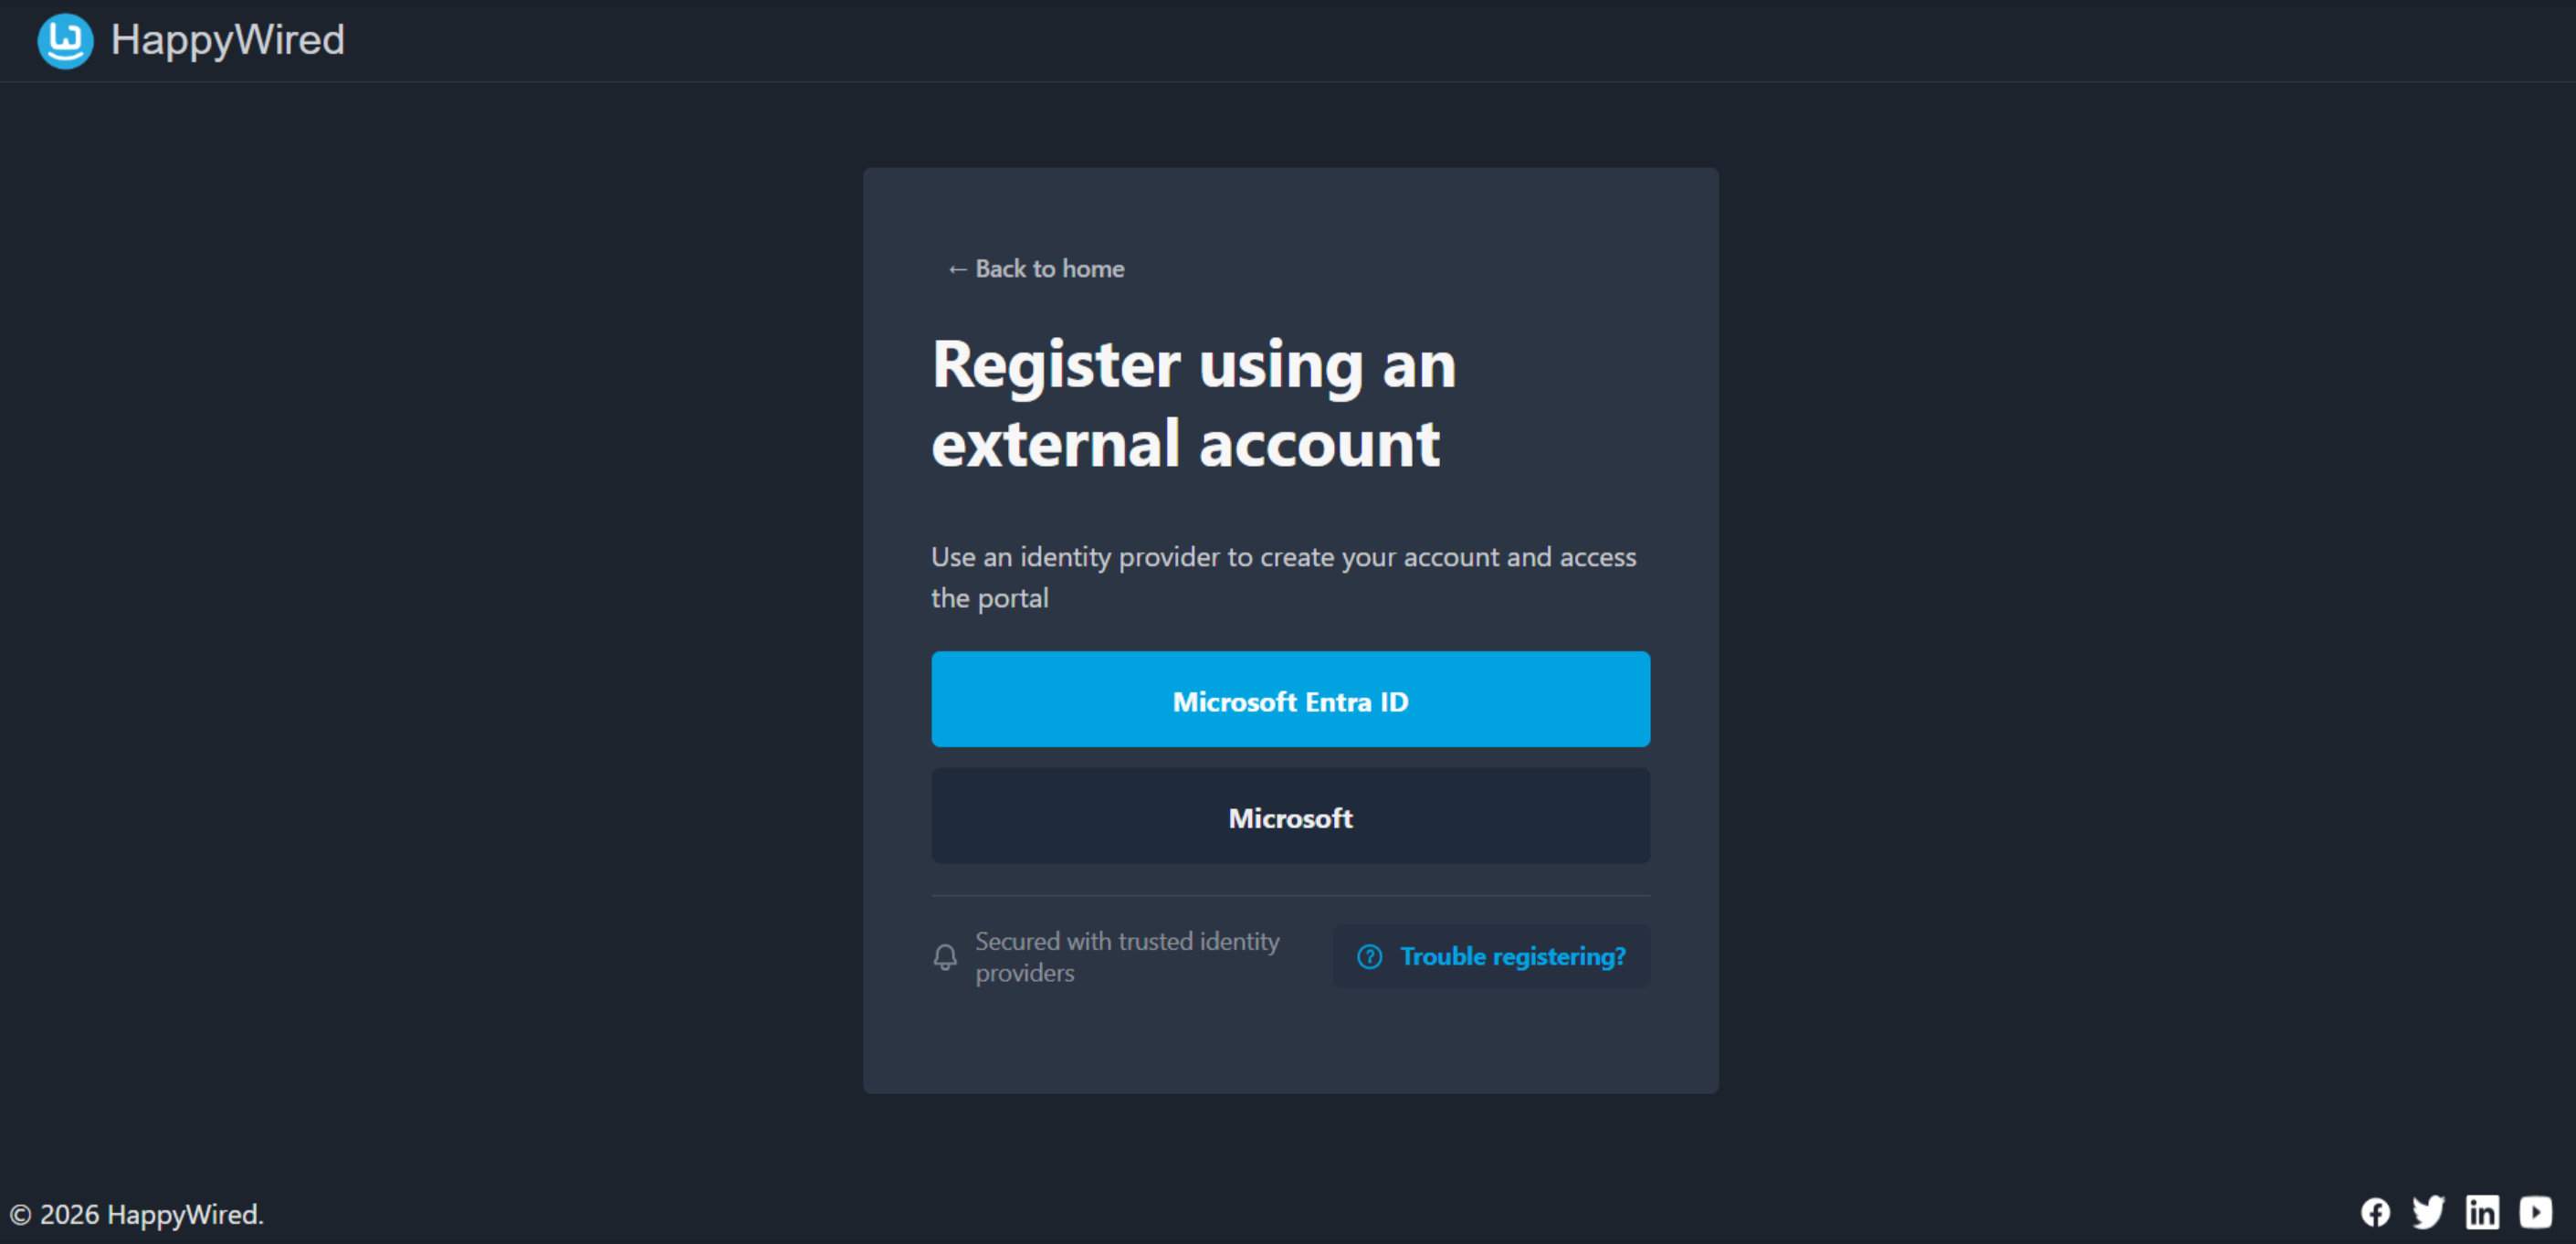
2.2 Completing Registration
The registration page presents two options. Choose the provider that is most appropriate for you. After selecting your provider, you will be directed to Microsoft’s authentication flow. Sign in with your Microsoft credentials when prompted, there is no need to fill in any separate registration form.
Once you have authenticated successfully, your account is automatically linked to the contact record that HappyWired holds for you. This is what grants you access to your cases and other data within the portal.
Registration is a one-time process. On all future visits you can simply sign in.
3. Signing In
The portal uses external identity providers, credentials are never entered directly into the portal. Two sign-in options are available on the login screen.
- Microsoft Entra ID (formerly Azure Active Directory)
- Microsoft
Use the same provider you registered with. Signing in with a different provider/credentials will not connect you to your portal account.
3.3 Trouble Registering/Signing In
If you cannot sign in or register, click the Trouble signing in/registering? link. This opens a help page with guided options.
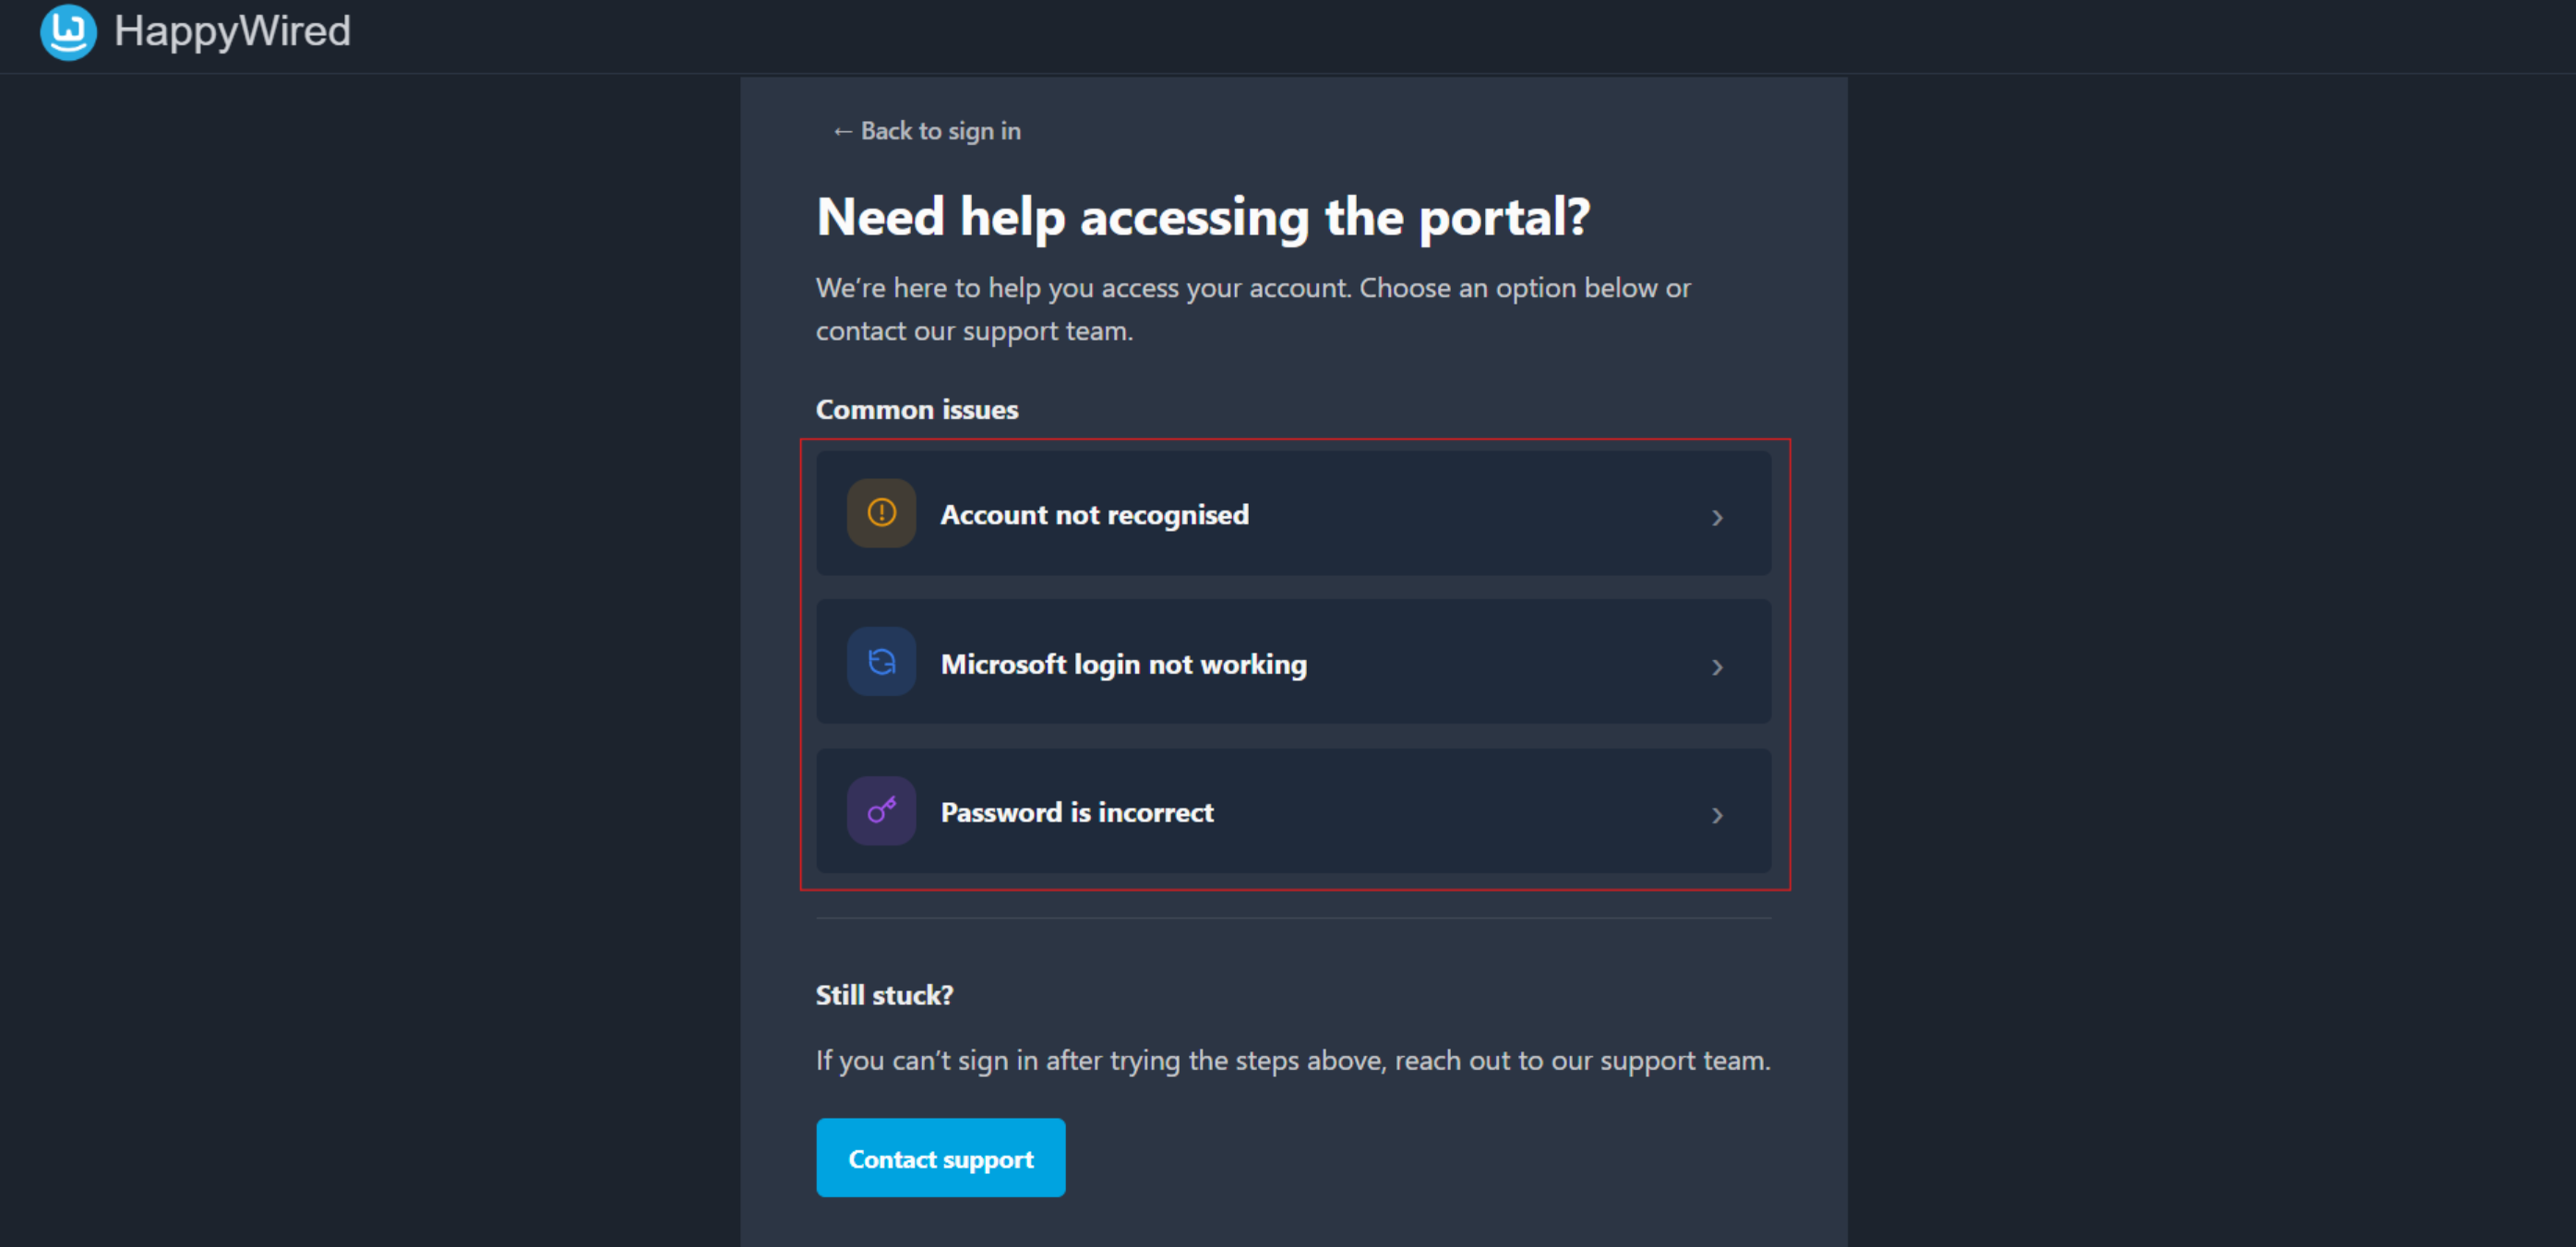
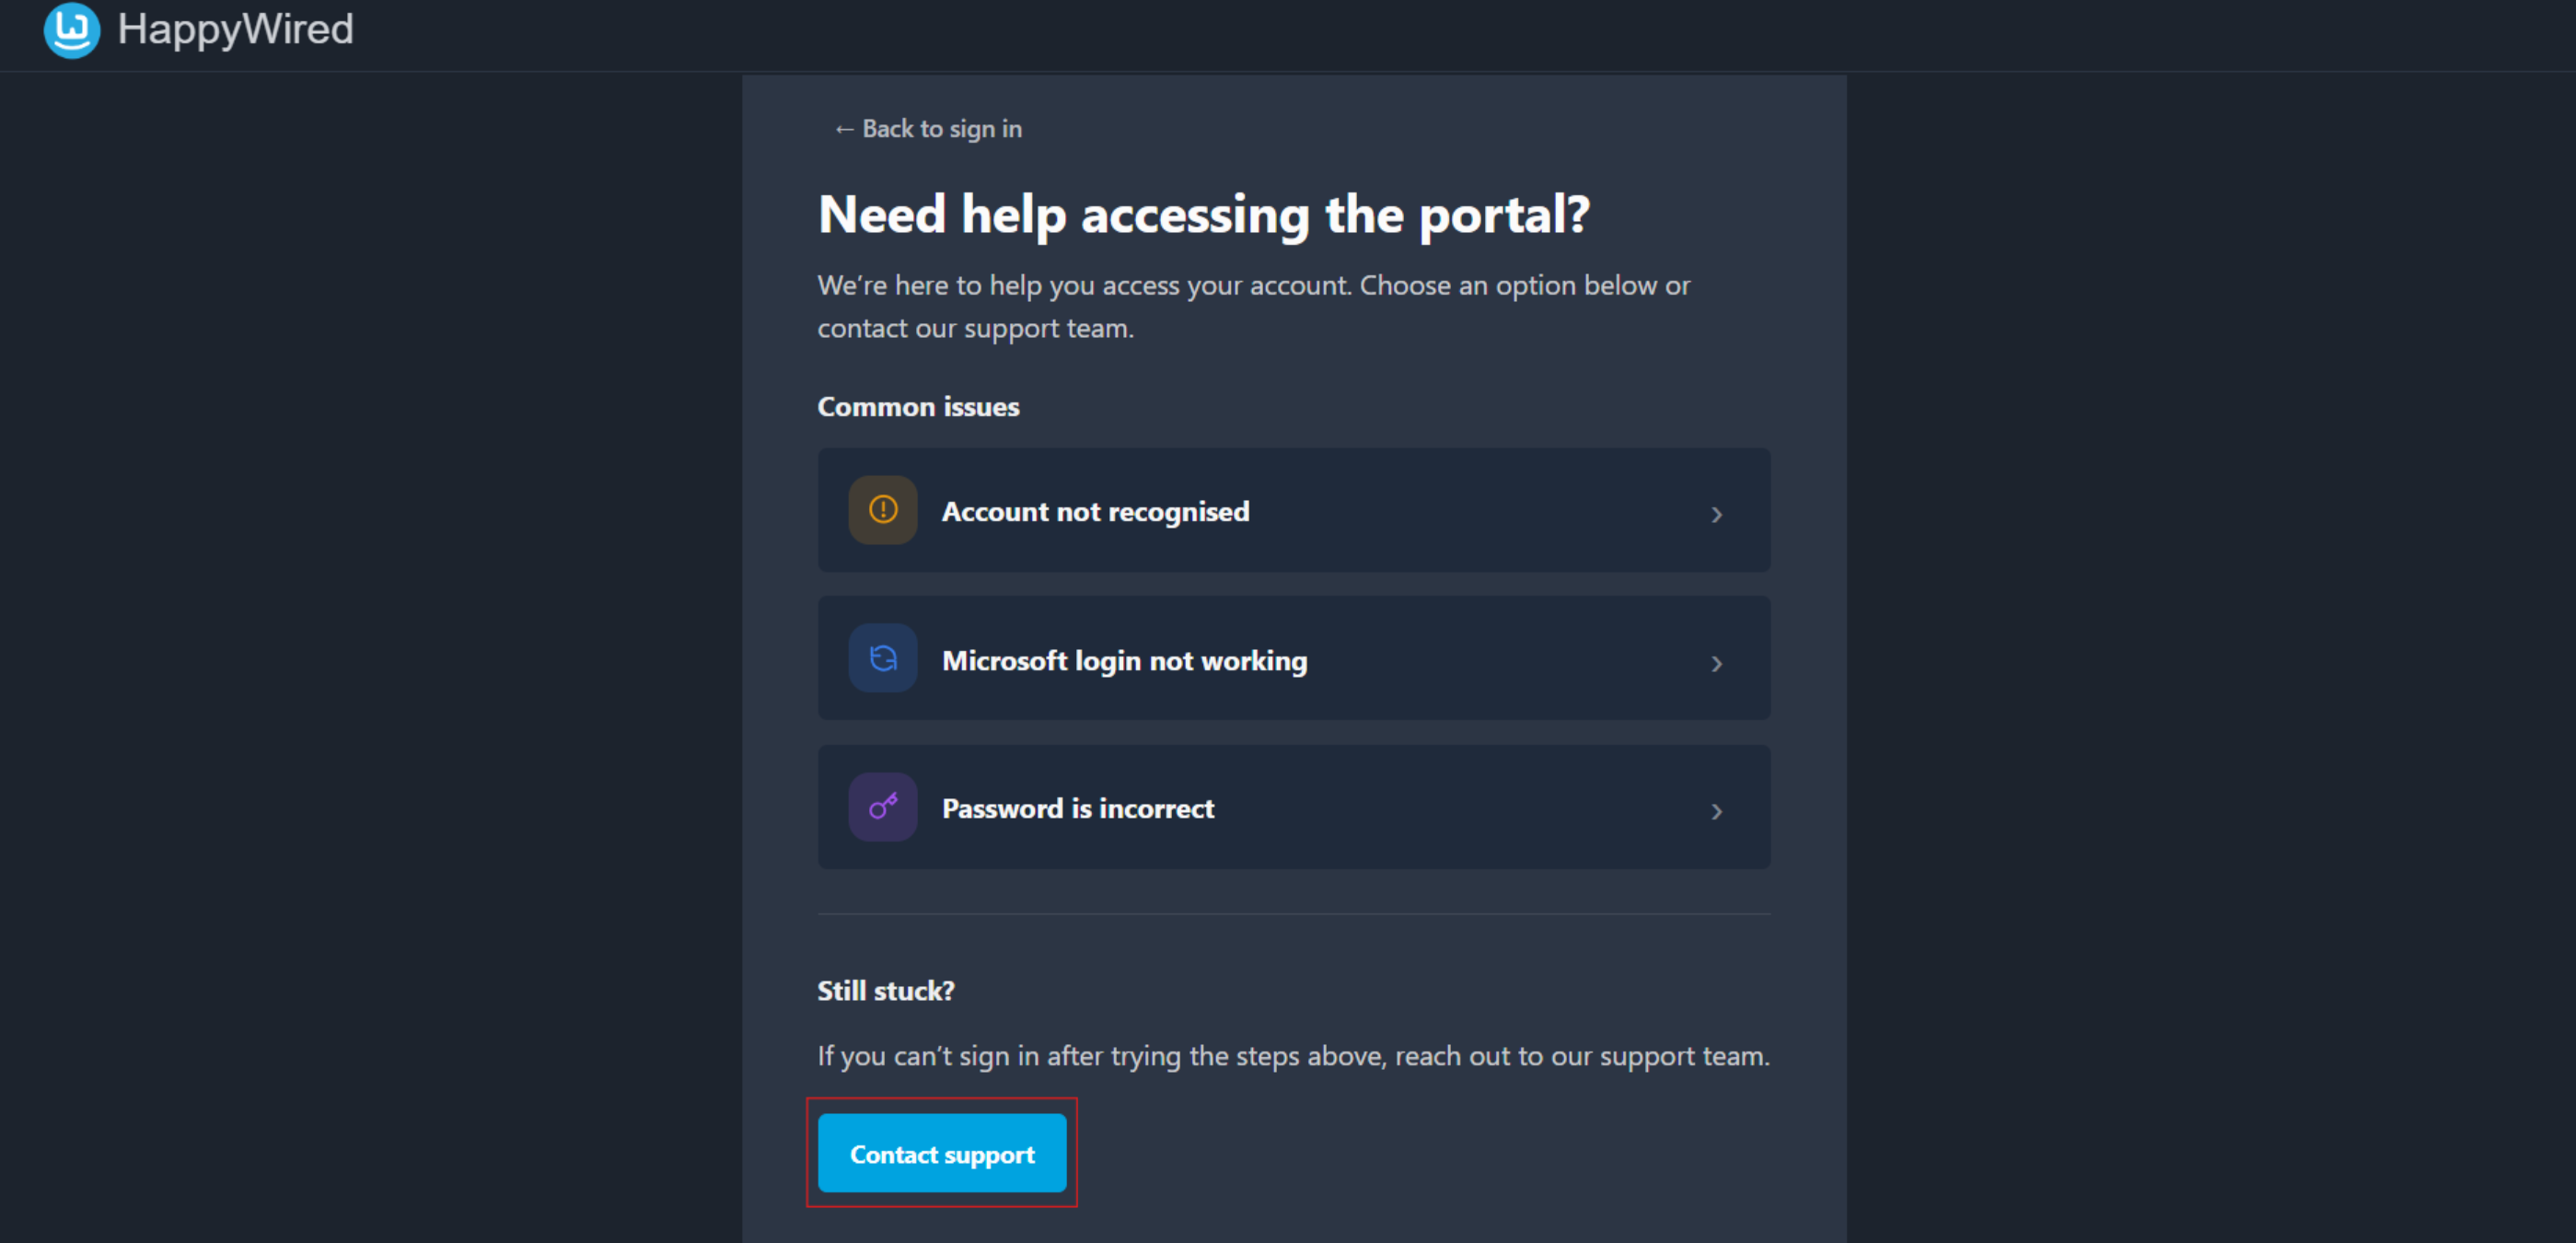
If none of the self-service options resolve the problem, click Contact support at the bottom of the help page to reach the HappyWired support team directly through email.
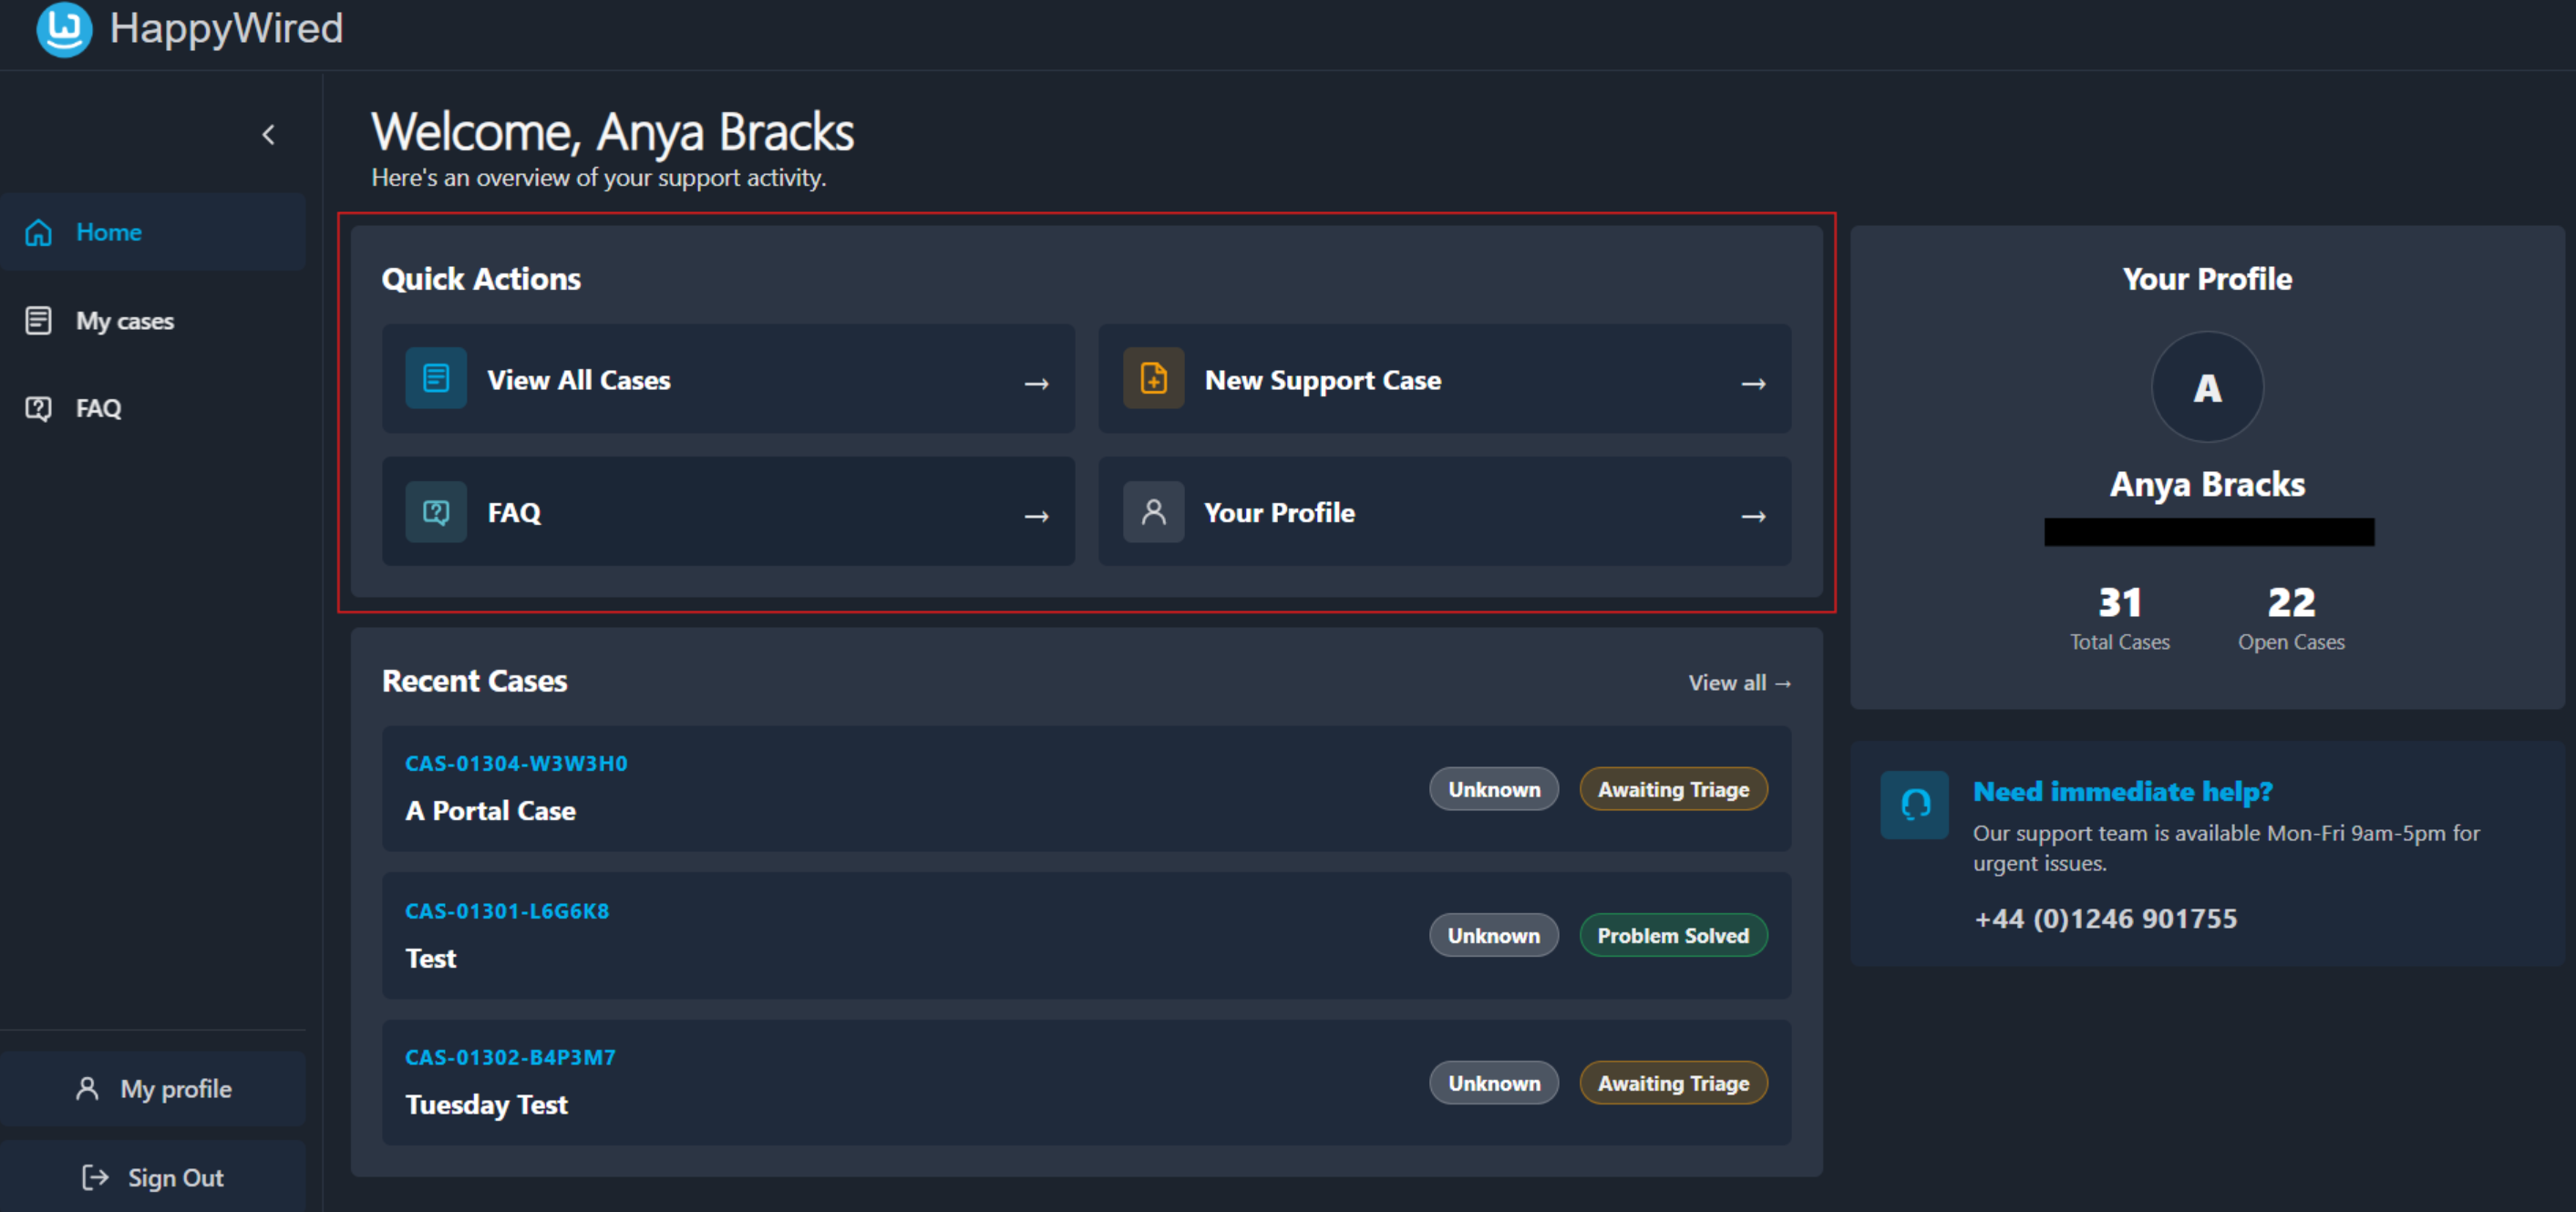
4. Home
The Home dashboard is the first screen visible after logging in. It is divided into three main areas: Quick Actions, Recent Cases, and Your Profile.
4.1 Quick Actions
The Quick Actions panel is a shortcut grid at the top of the dashboard. It provides one-click access to the most common tasks in the portal.
| Quick Action Item | Description |
|---|---|
| View Cases | Navigates directly to the full case list. |
| New Support Case | Opens the case submission form so issues can be raised with the support team. |
| FAQ | Navigates directly to the FAQ section. |
| Your Profile | Opens the account profile page. |
4.2 Recent Cases
The Recent Cases panel displays the three most recently updated support cases. It is designed to give an at-a-glance view of active issues without needing to navigate away from the dashboard.
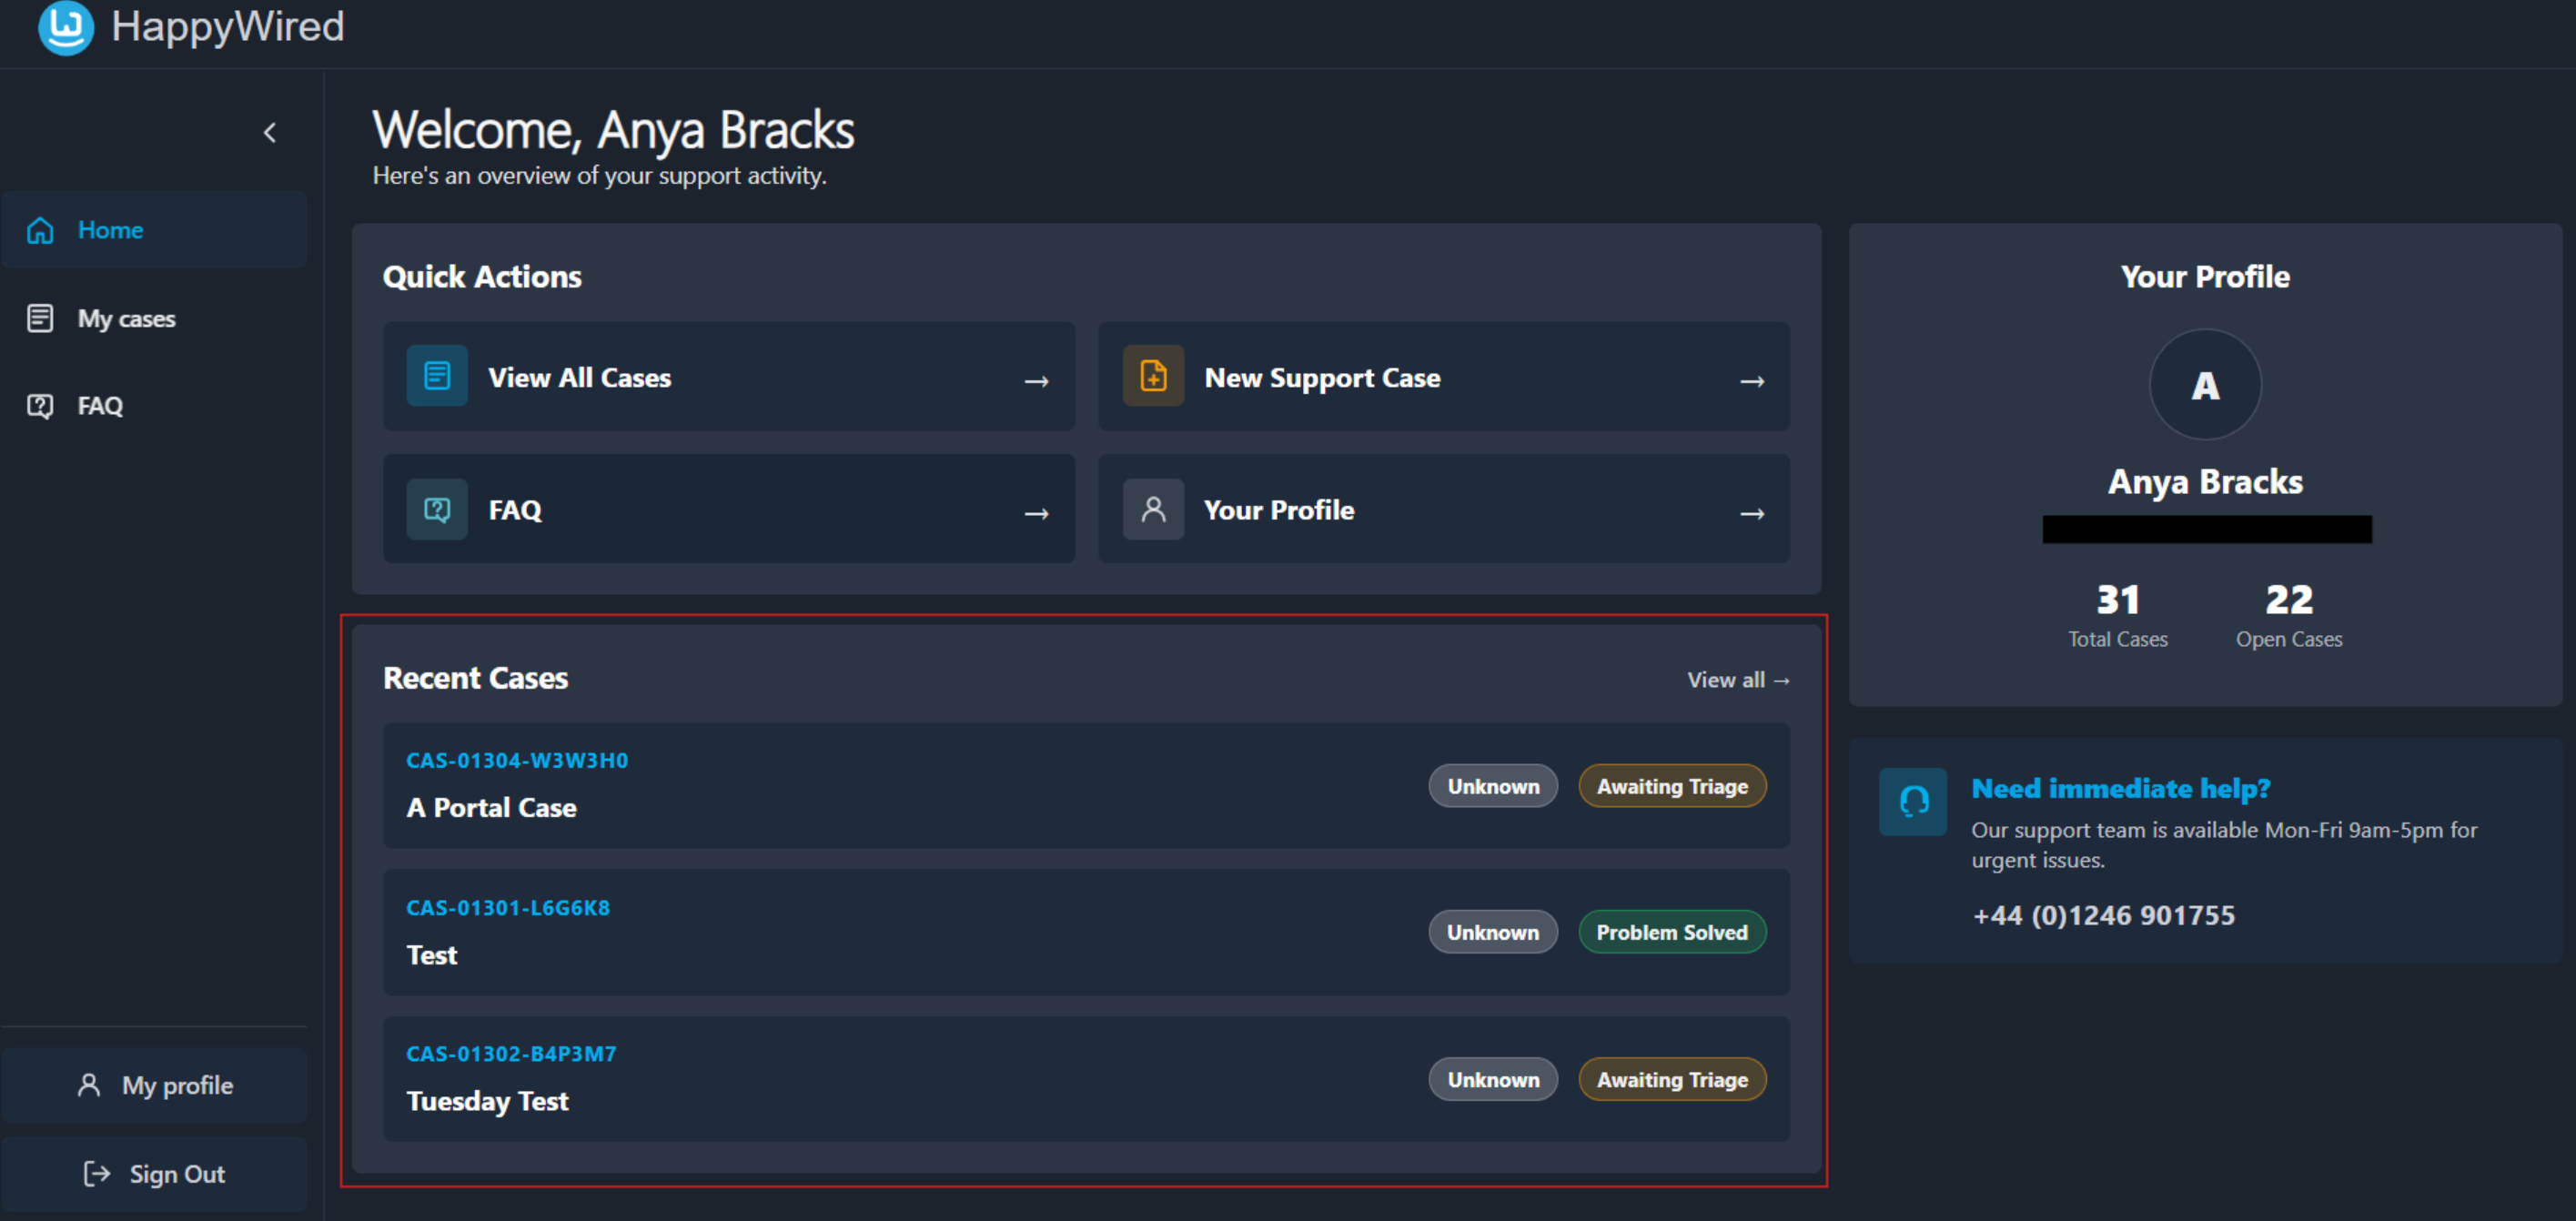
4.2.1 Reading the Case List
Each entry in the list shows the same information.
| Field | Description |
|---|---|
| Case Reference Number | A unique identifier for the support case. |
| Case Title | A short description of the issue. |
| Priority Badge | Indicates the urgency of the case. |
| Status Badge | Shows the current stage of the case in the support workflow. |
4.2.2 Viewing All Cases
To see the complete case history, click the View all → link in the top-right corner of the panel, or select My Cases from the sidebar. There is also the option of View Cases in Quick Actions.
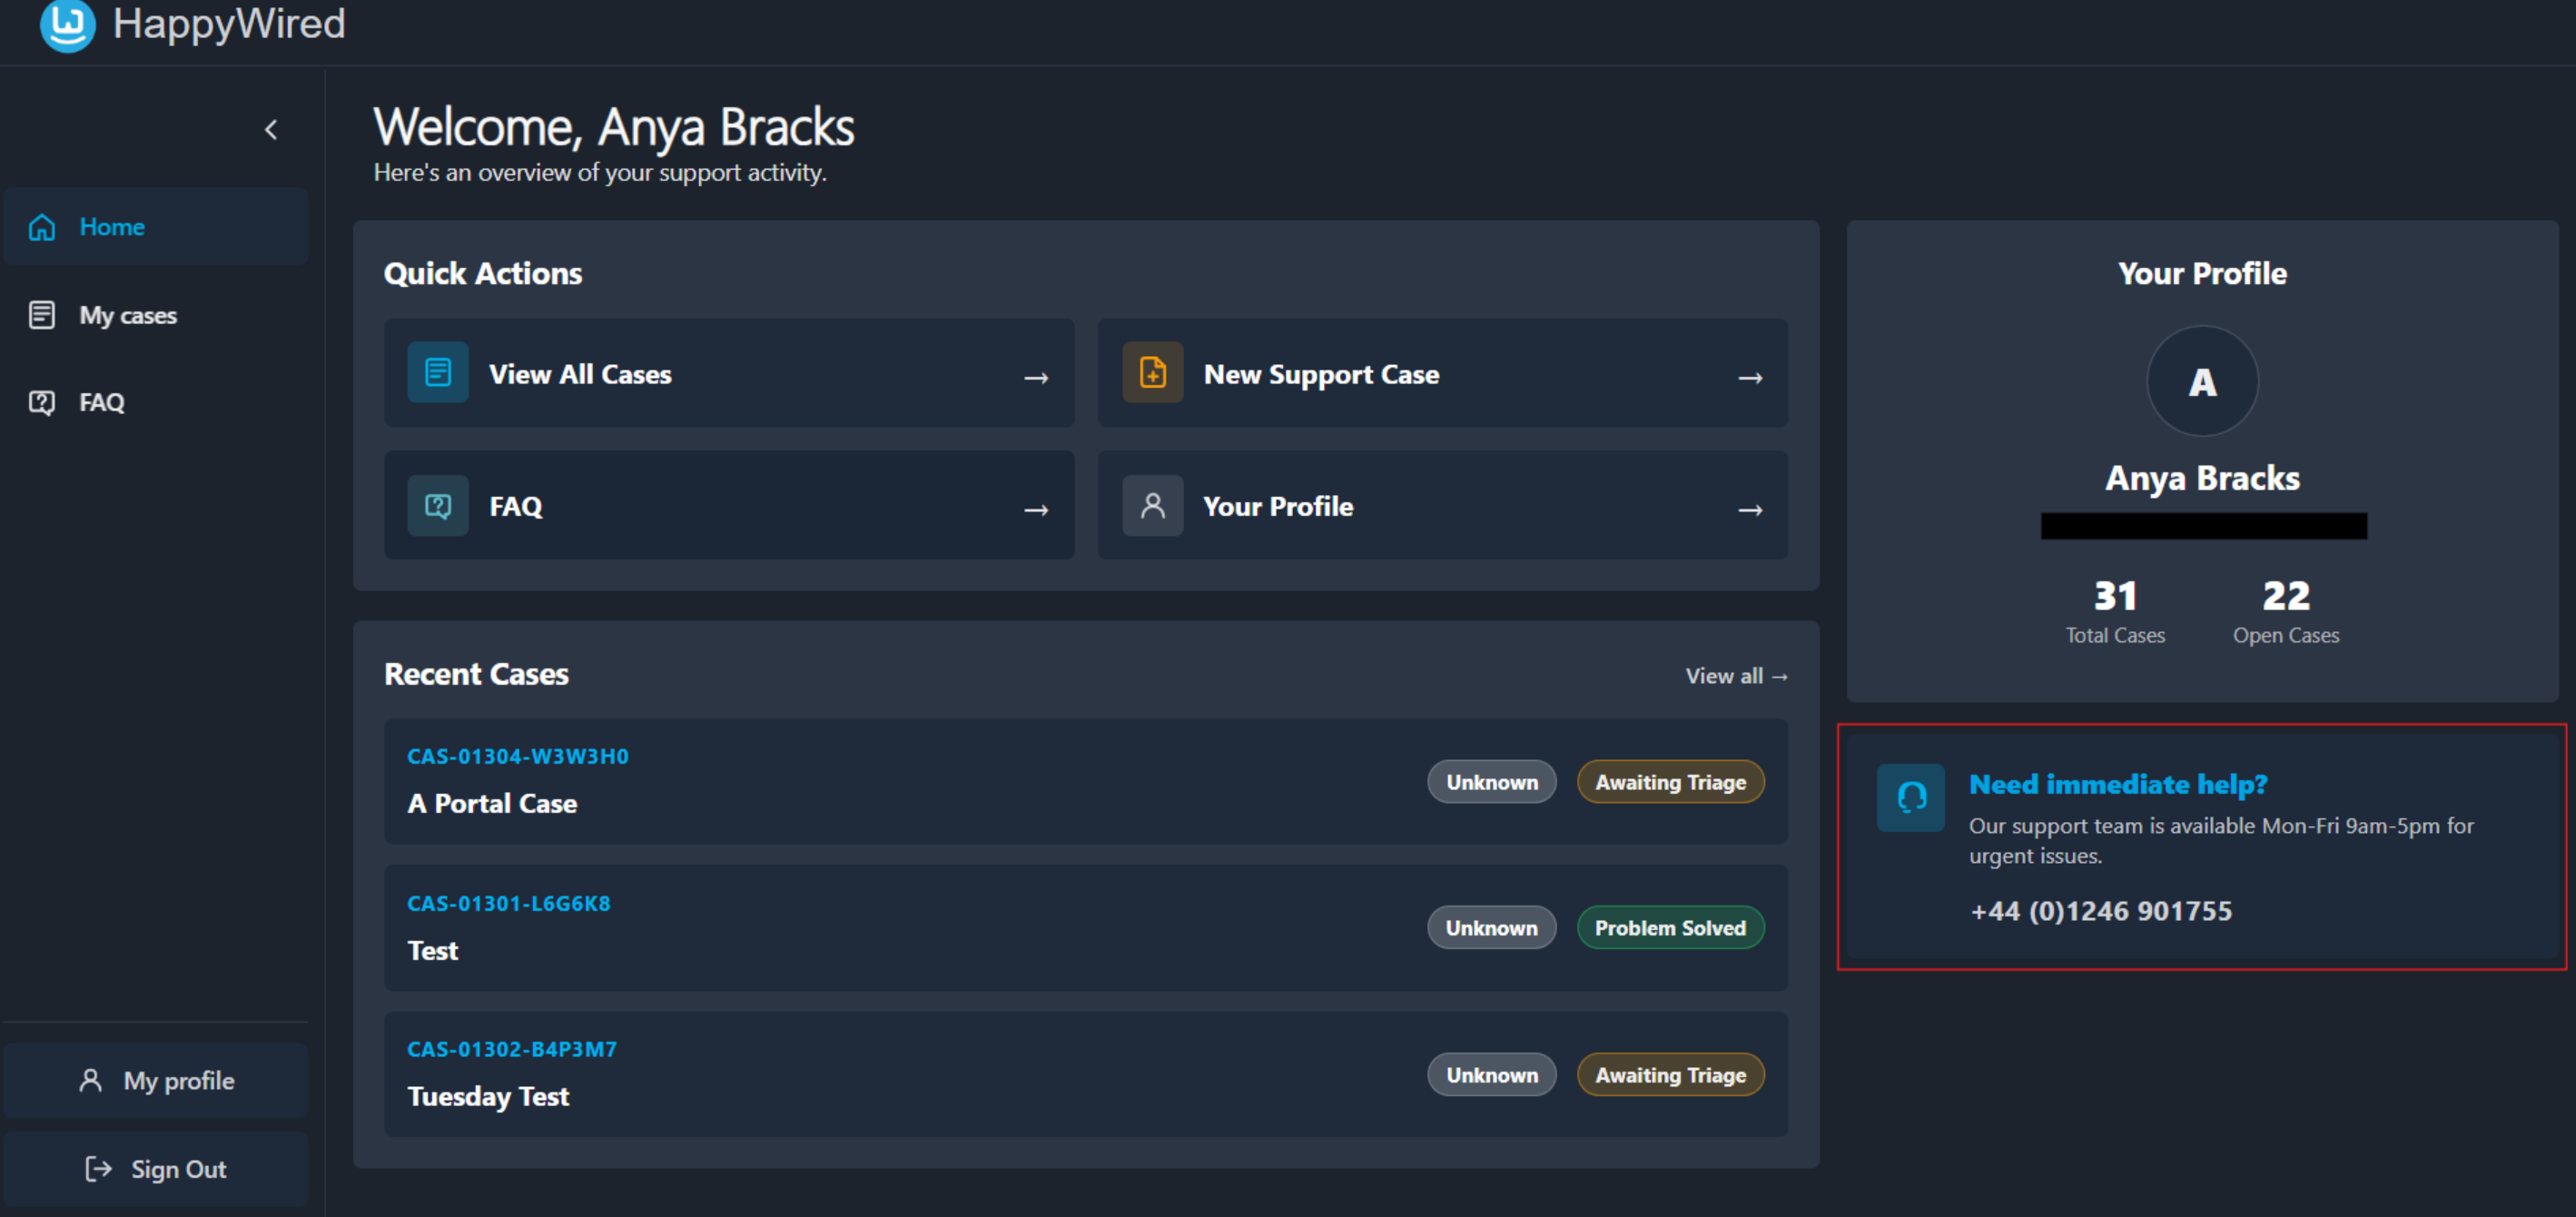
4.3 Your Profile
The Your Profile panel is displayed on the right-hand side of the dashboard. It provides a snapshot of account information and portal activity.

4.4 Need Immediate Help?
A widget is displayed below the Your Profile panel on the right-hand side of the dashboard. Use this if the issue is urgent.
5. My Cases
My Cases is the full case management view. Access it via the sidebar, View all → (Recent Cases) or the View Cases (Quick Actions).
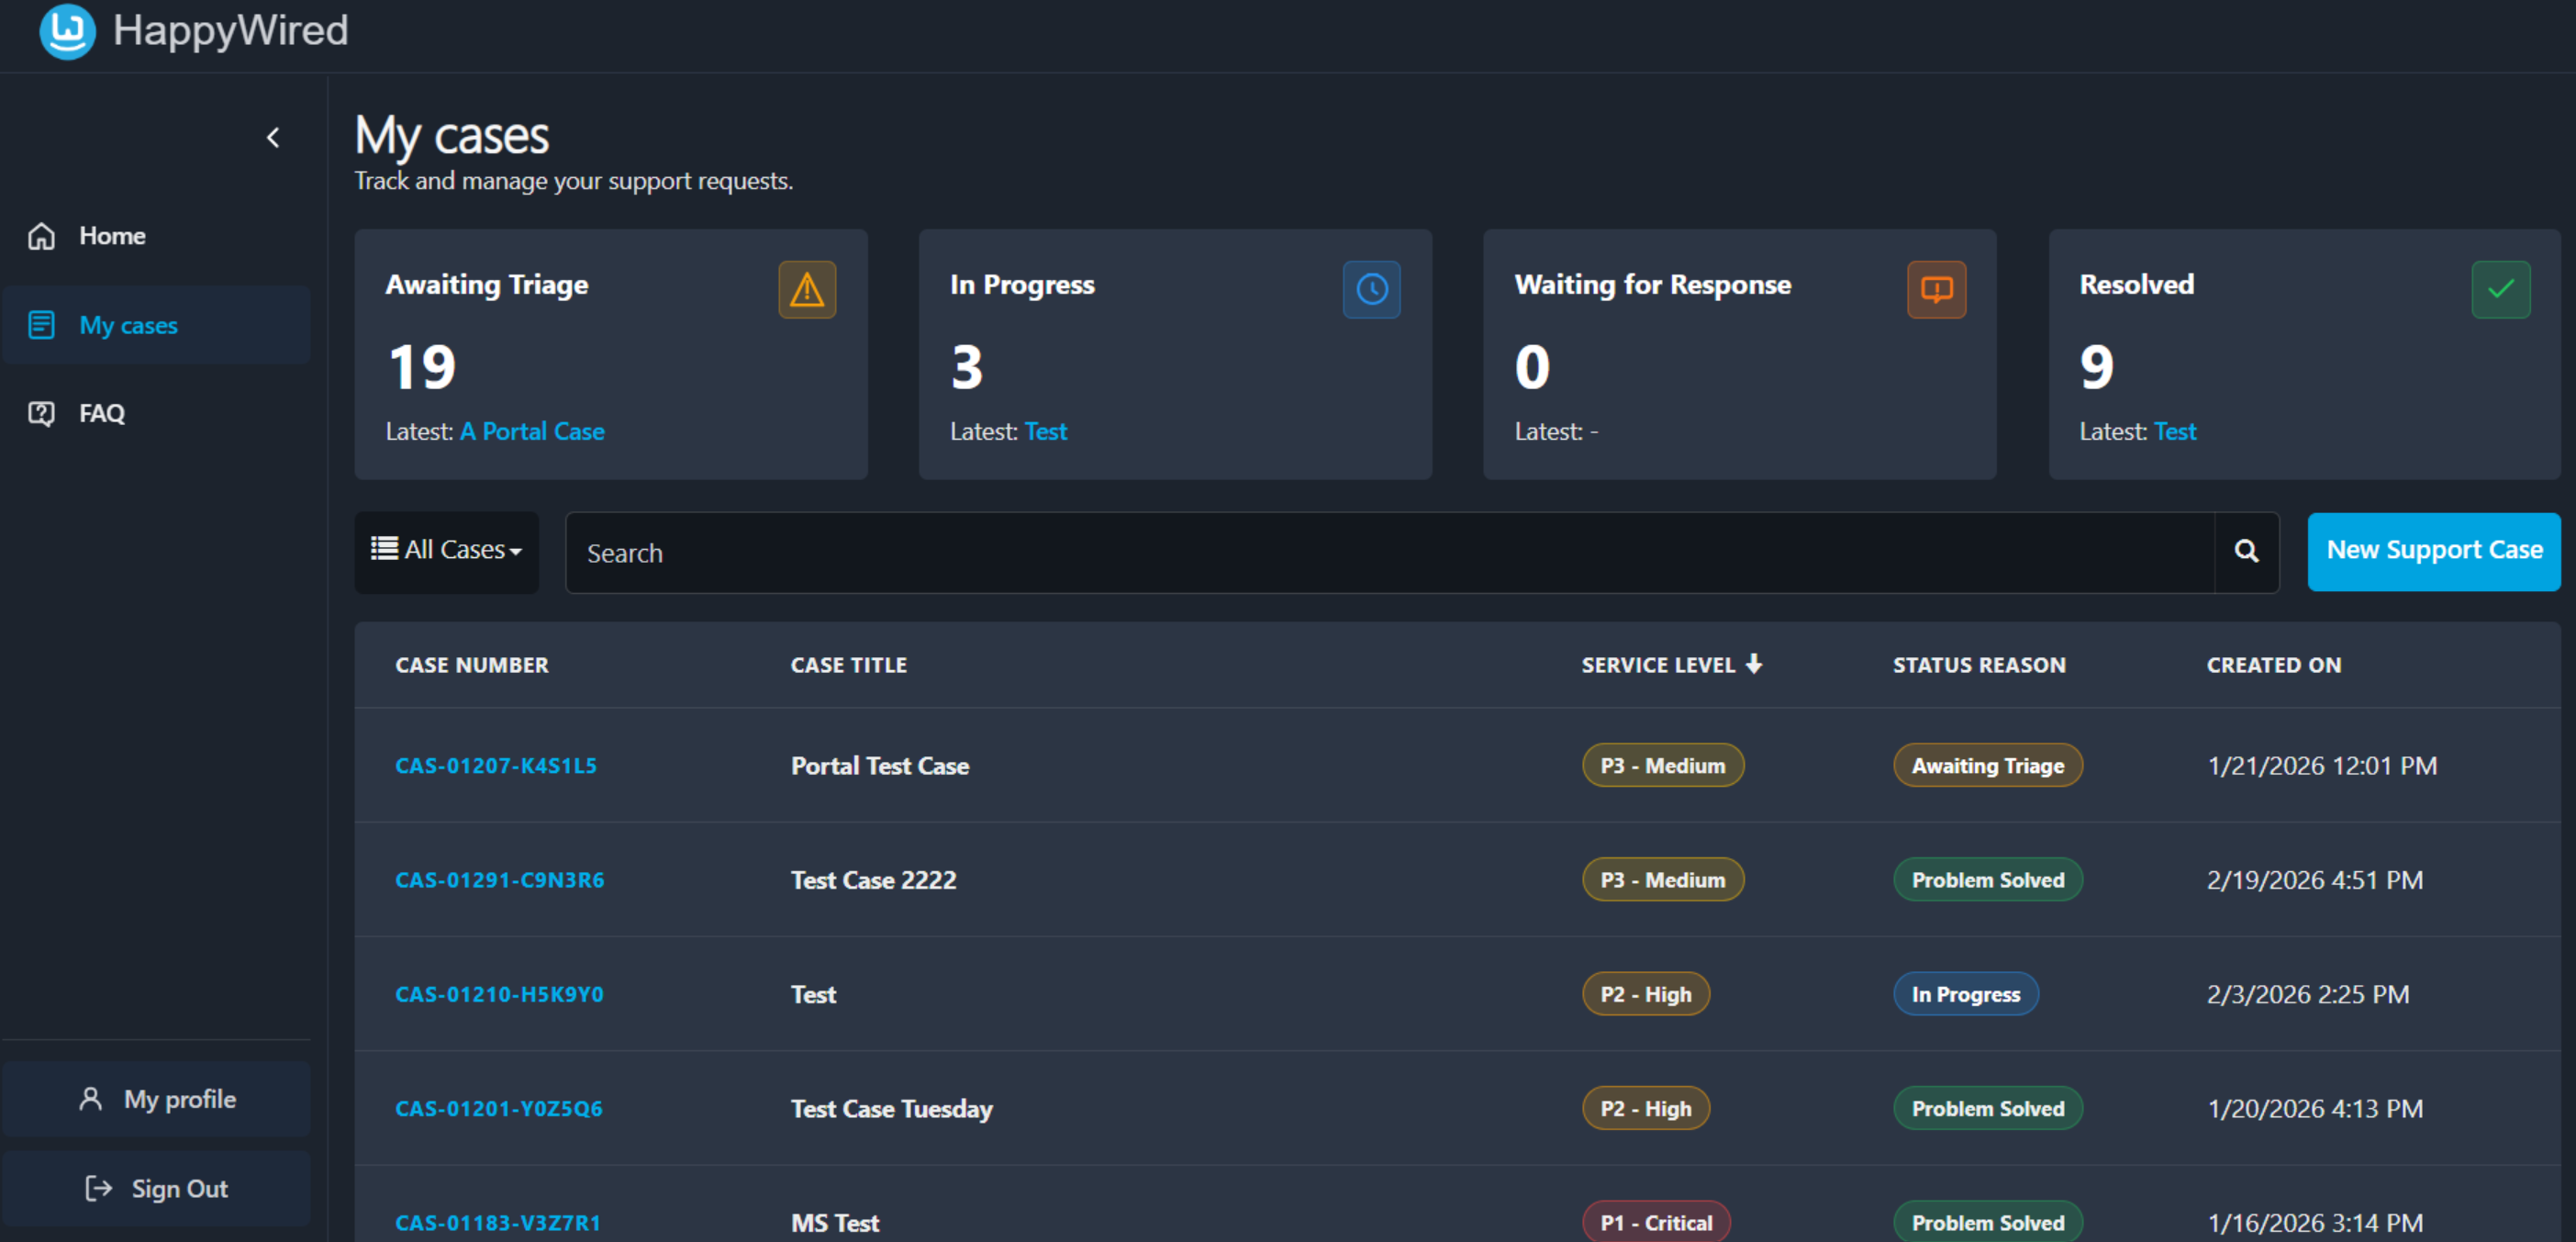
5.1 General Information
5.1.1 Searching and Filtering
Use the Search bar to find cases by keyword, case number, or title.

The dropdown to the left of the search bar can be used to filter the list view by the following:
- All Cases
- My Cases
- My Open Cases

5.2 Raising a New Support Case
To log a new support case, click New Support Case from the Quick Actions panel on the home dashboard, or from the button on the My Cases page. This opens the new support case form.
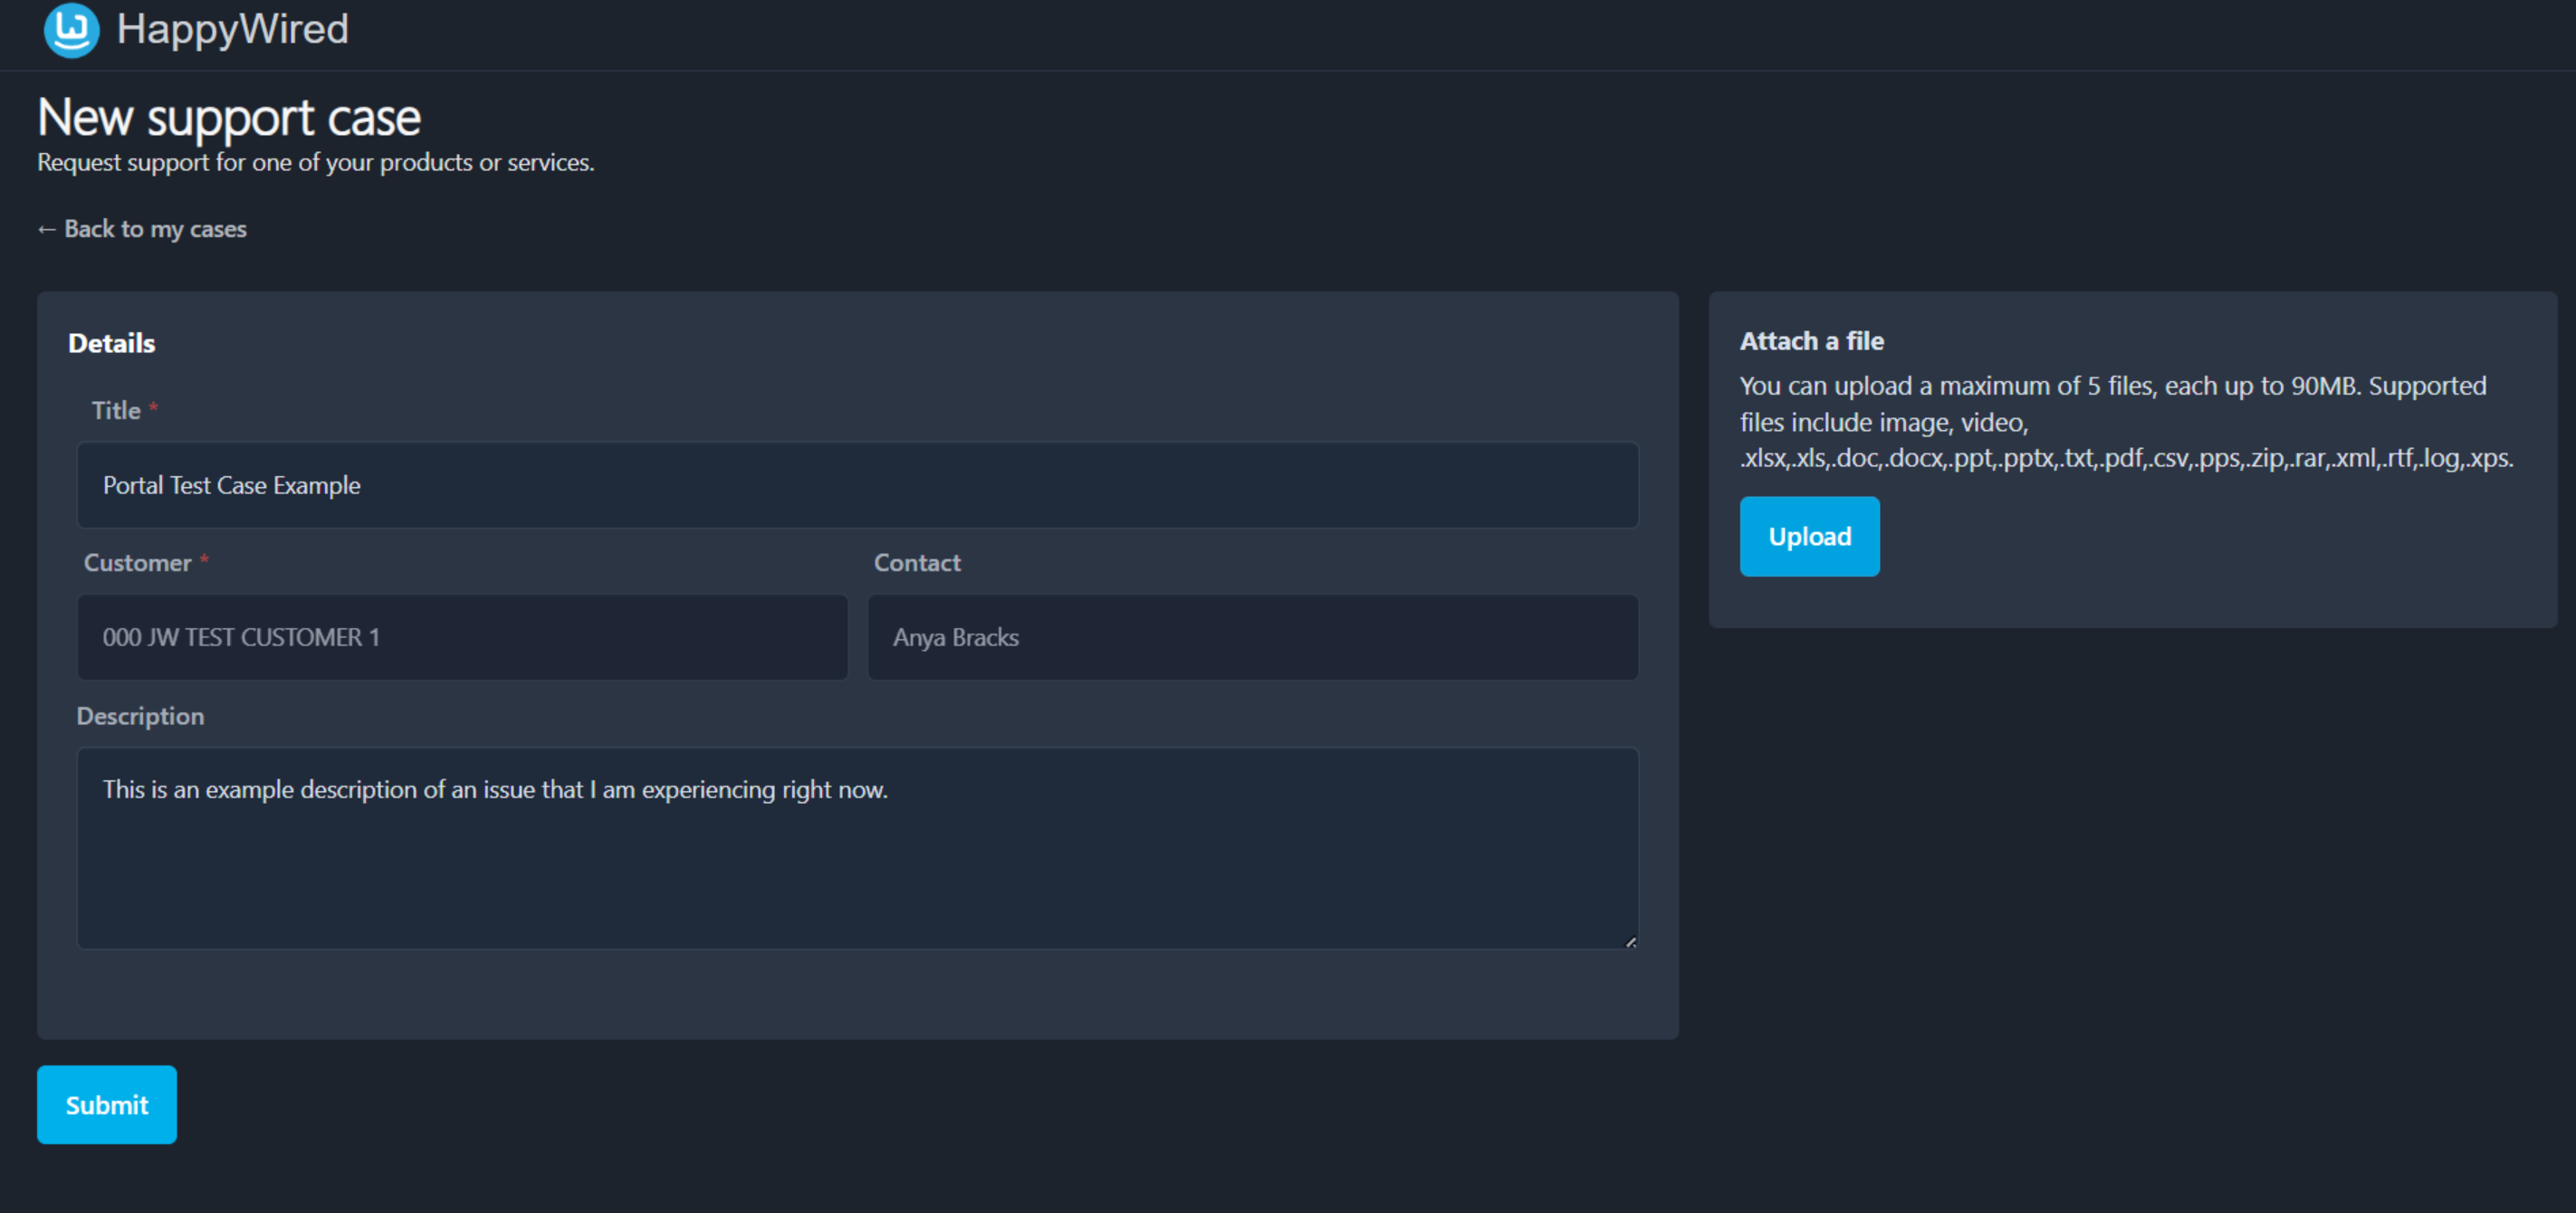
5.2.1 Completing the Form
| Field | Description |
|---|---|
| Title (required) | A short, specific description of the issue. Avoid vague titles such as ‘Problem’ or ‘Help’. |
| Customer (read-only) | Pre-populated with your linked customer account. This field is read-only and cannot be changed. |
| Contact (read-only) | Pre-populated with your account name. Confirms who submitted the case. This field is read-only and can only be changed through profile settings. |
| Description | A full explanation of the issue. Include as much detail as possible: what happened, when it started, error messages seen, steps already taken, and what has been affected. |
5.2.2 Attaching Files
The Attach a file panel on the right side of the form allows you to upload supporting evidence such as screenshots, logs, or documents.
- Up to 5 files per case submission are permitted.
- Maximum file size is 90 MB per file.
- Supported formats include: image, video, .xlsx, .xls, .doc, .docx, .ppt, .pptx, .txt, .pdf, .csv, .pps, .zip, .rar, .xml, .rtf, .log, .xps.
Click Upload to open a file browser and select your files.
5.2.3 Submitting
Click Submit at the bottom-left of the form. On successful submission you will be returned to My Cases and the new case will appear in the list with the status of Awaiting Triage.
Click ← Back to my cases at the top of the page to cancel and return without submitting.
5.3 View an Existing Support Case
Click any case reference number (always shown in blue) in the Recent Cases panel or the My Cases list to open that case’s detail view.
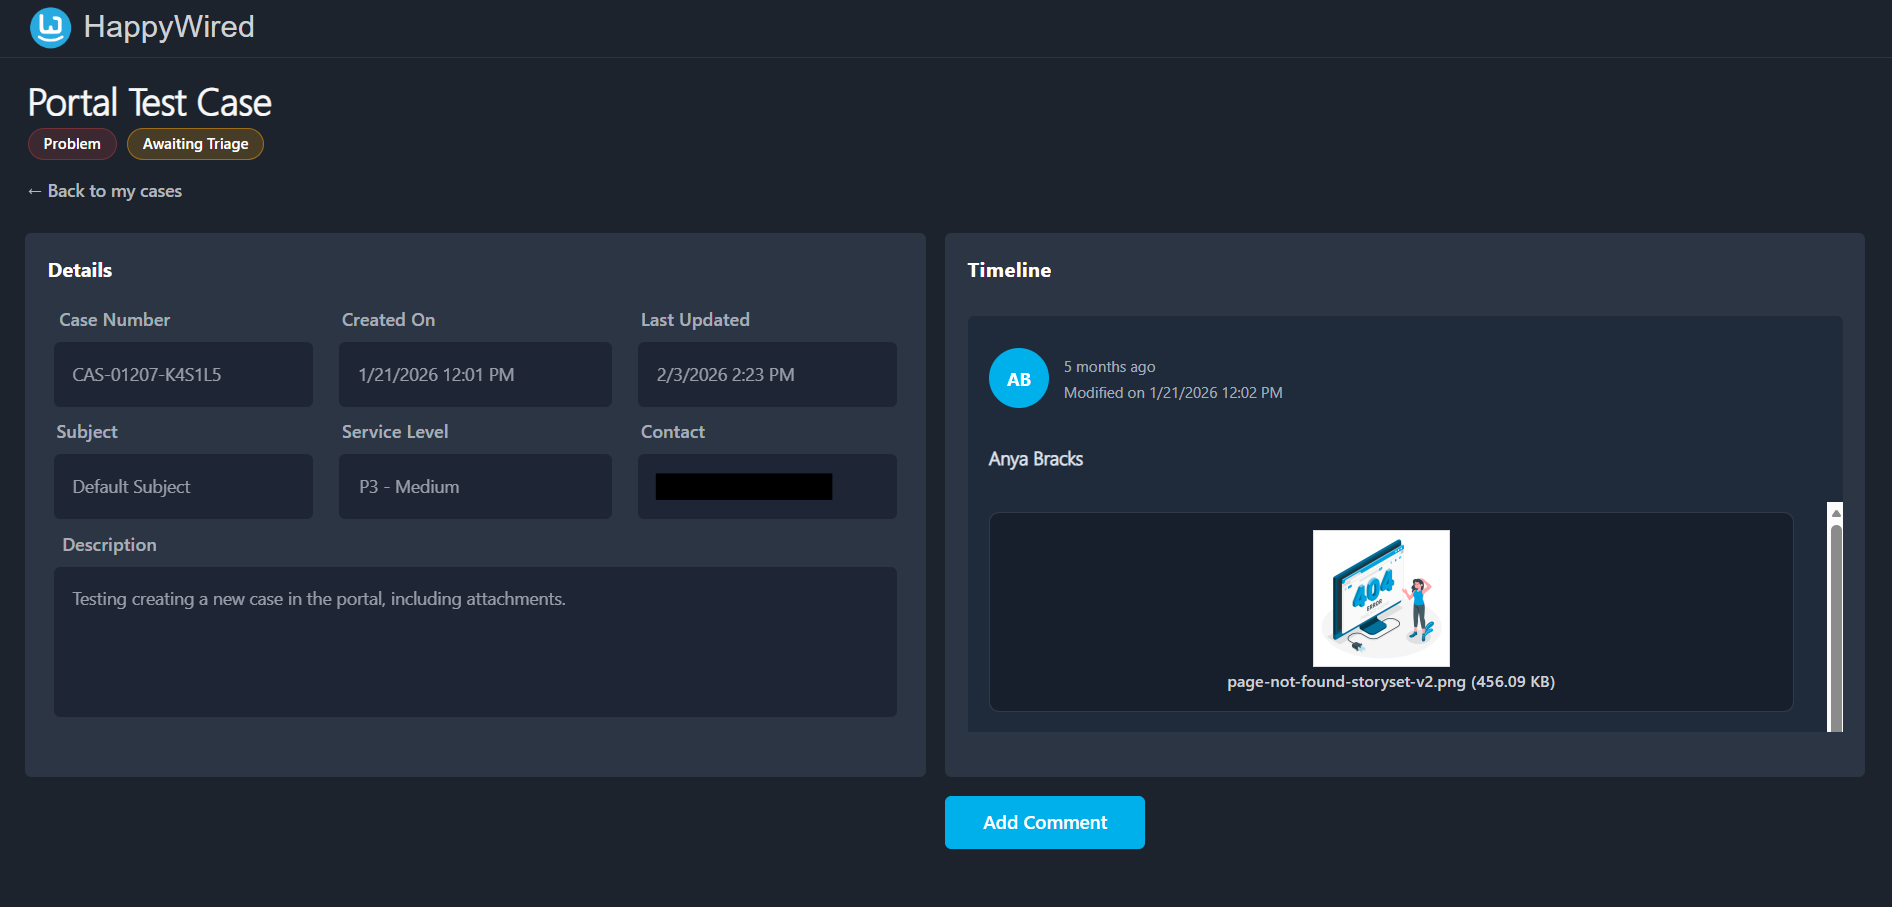
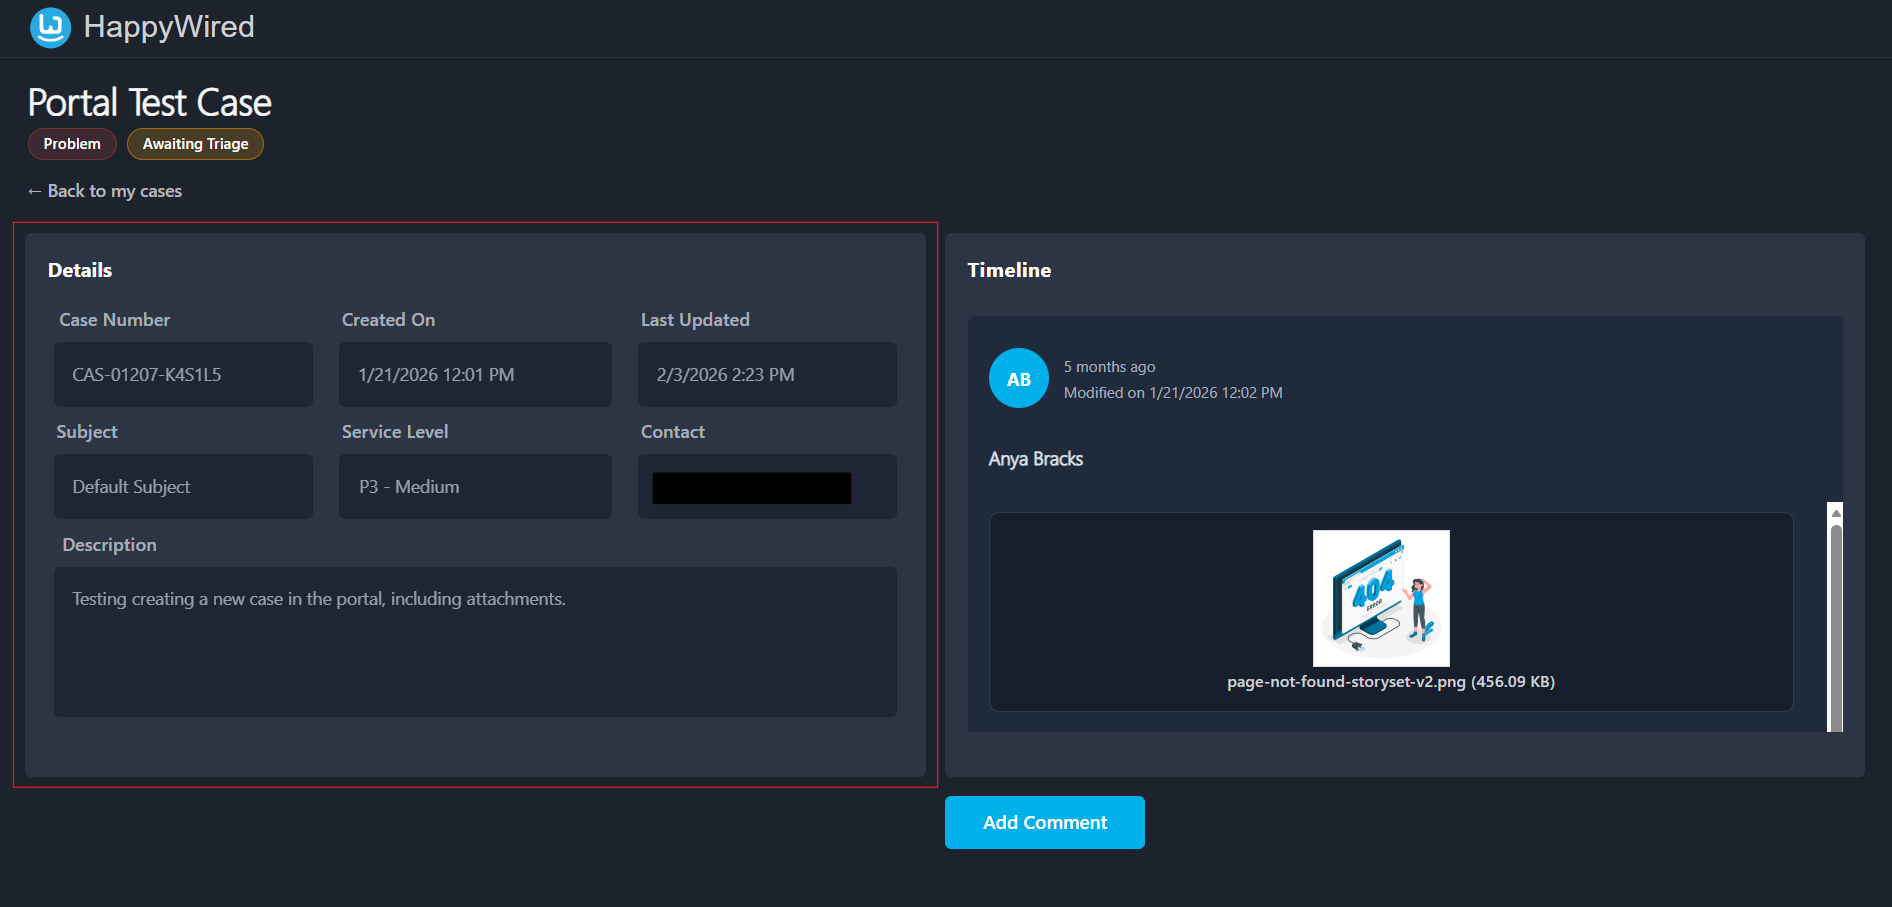
5.3.1 Details Panel
The left-hand Details panel shows all information recorded against the case.
| Field | Description |
|---|---|
| Case Number | Unique reference for this case. |
| Created On | Date and time the case was submitted. |
| Last Updated | Date and time of the most recent activity on the case. |
| Subject | The category of the case. |
| Service Level | The priority assigned during triage. |
| Contact | The user associated with the case (typically who raised the case originally). |
| Description | The full problem description provided at submission. |
The case title and current status badges are displayed at the top of the page above the Details panel.
5.3.2 Timeline Panel
The right-hand Timeline panel shows a chronological log of all activity on the case. Each entry should show:
- The name of the person who made the timeline post.
- The date and time of the activity.
- The content of the timeline post.

The timeline is read-only. To add your own post, use the Add Comment button.
5.3.3 Adding a Comment
Click Add Comment at the bottom of the case detail page. A modal dialogue box opens with two fields.
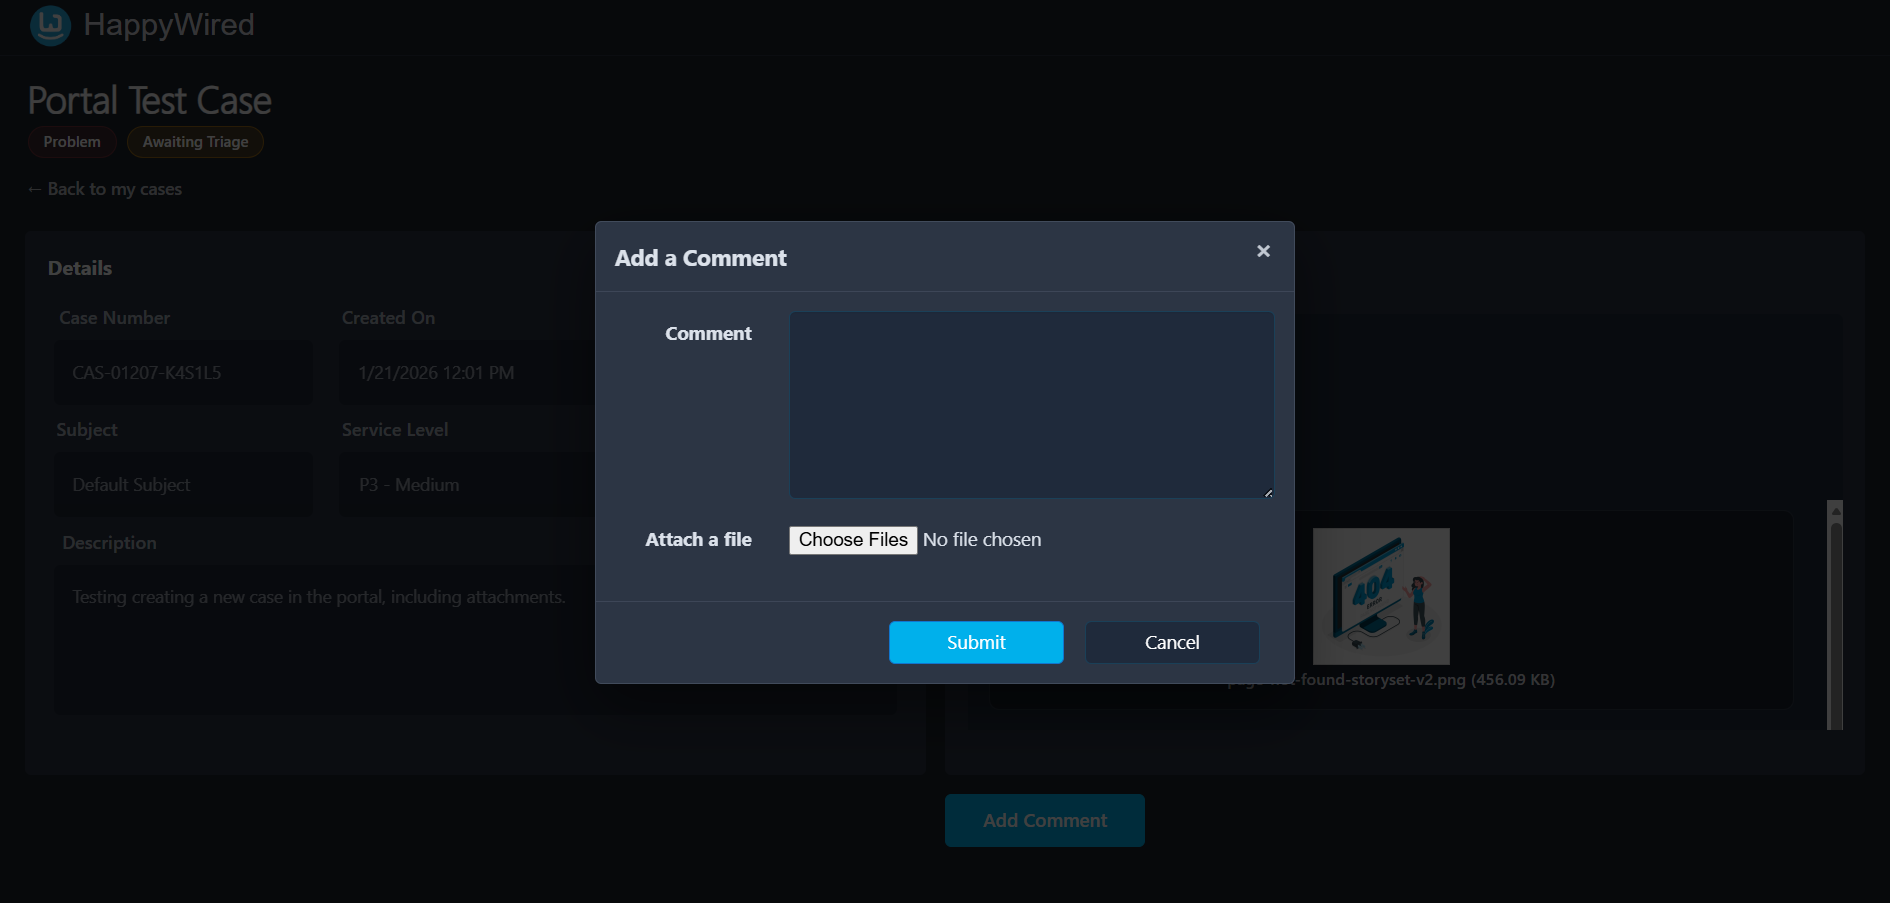
| Field | Description |
|---|---|
| Comment (text area) | Type your update, question, or additional information here. This is attached directly to the case which the support team has full visibility over. |
| Attach a file | Optionally attach a supporting file to your comment. Click Choose File to browse for a file. |
Click Submit to send the comment. Click Cancel to close the dialogue without saving. Once submitted, your comment will appear in the Timeline.
6. FAQ (Frequently Asked Questions)
The FAQ section is a self-service library of answers to common portal questions. Access it via the sidebar or the Quick Actions section on the home dashboard.
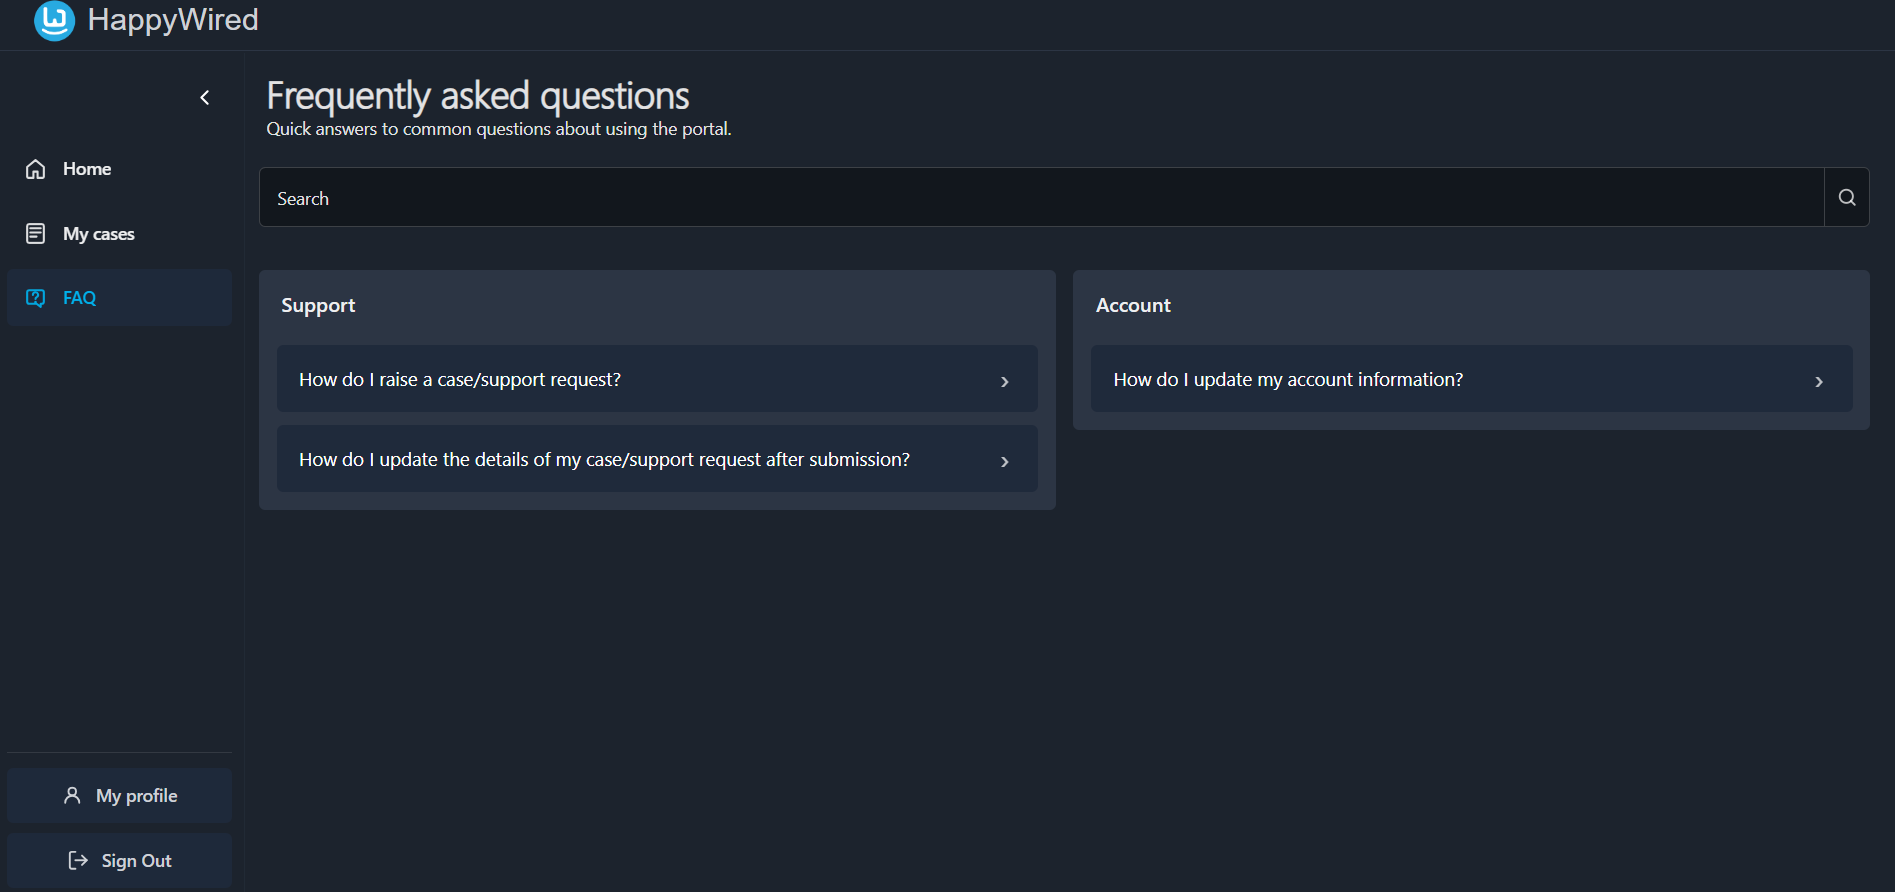
Questions are organised into categories. Each question is listed as a collapsible row. Click a row to expand it and read the answer. Click again to collapse it.
A search bar at the top of the page allows you to search across all questions by keyword.
7. Profile
My Profile/Profile Settings lets you update your personal contact details held against your account. Access it via My Profile in the sidebar, or in the Quick Actions section of the home dashboard.
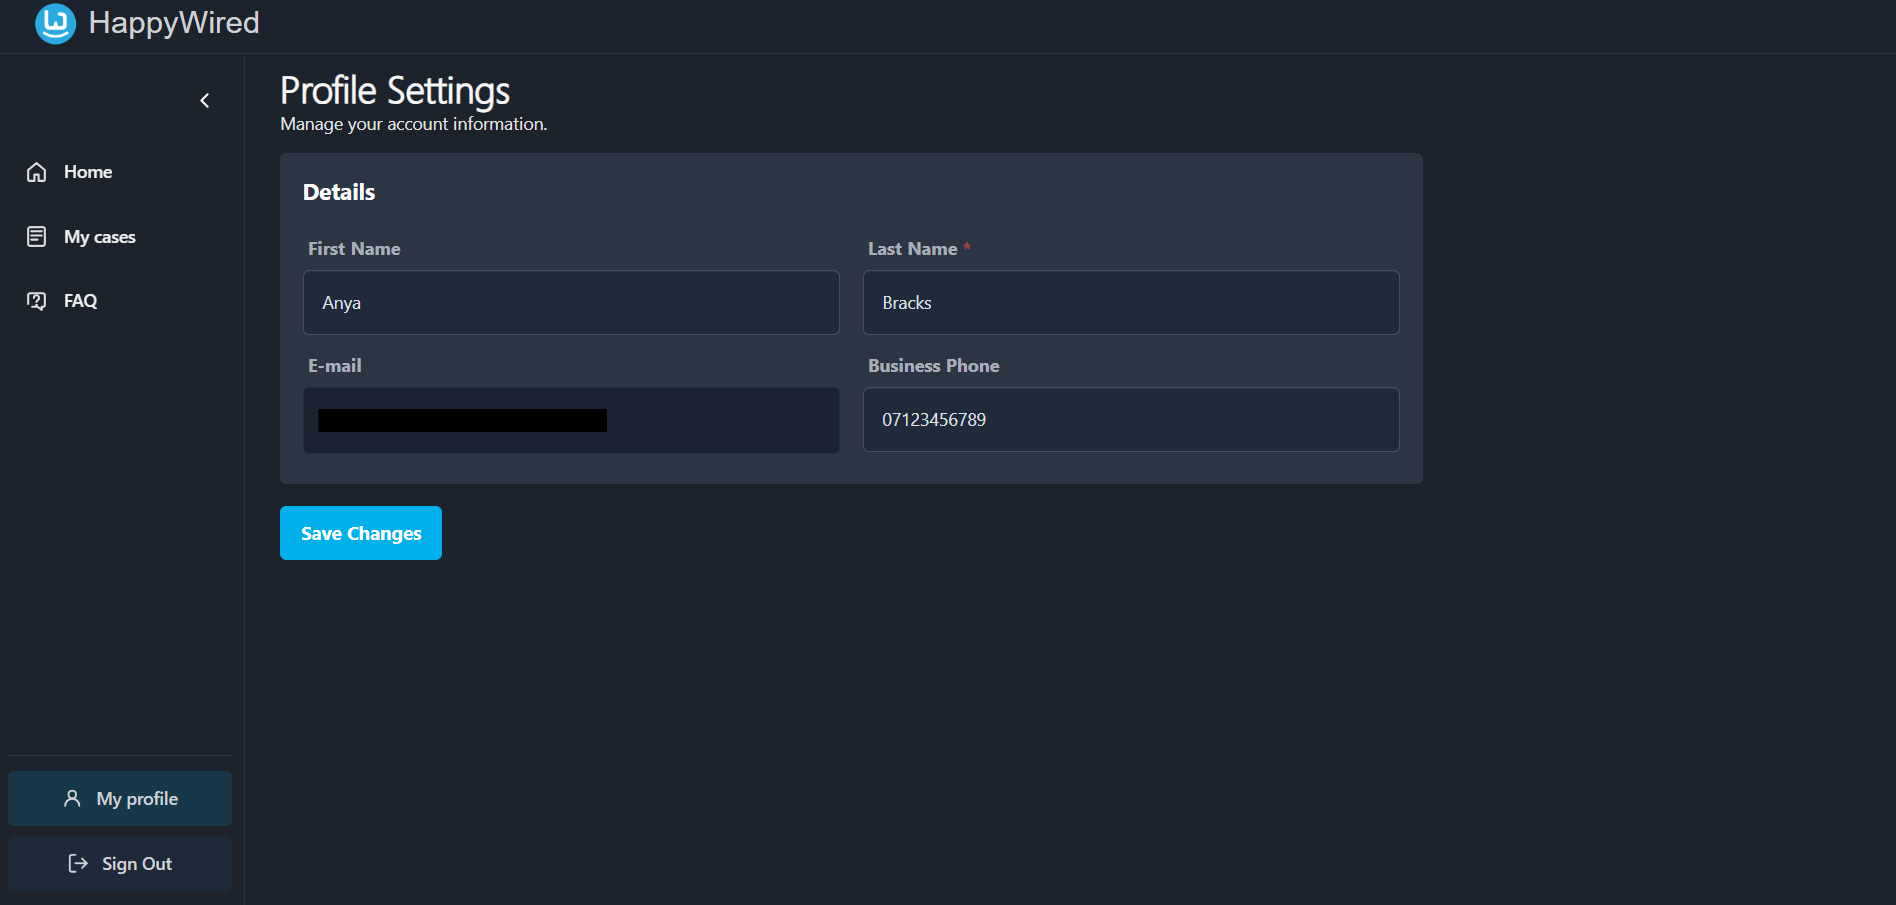
7.1 Editable Fields
| Field | Description |
|---|---|
| First Name | Your given name as it appears in the portal. |
| Last Name (required) | Your surname. This field is mandatory and cannot be left blank. |
| Business Phone | Your telephone number. Optional but recommended. |
The e-mail field is read-only and cannot be changed. If this requires updating, please contact the support team directly.
7.2 Saving Changes
After editing your details, click Save Changes to apply them. Changes take effect immediately.
8. Navigation Sidebar
The left-hand sidebar (on a smaller device this will be on the bottom of the screen) is the primary navigation menu. It remains visible at all times, giving you instant access to all sections of the portal.
A small arrow icon is visible at the top of the sidebar. Clicking this collapses the sidebar to create more screen space for the main content area. Click it again to expand it.
| Menu Item | Description |
|---|---|
| Home | Returns you to the main dashboard. Shows Quick Actions, Recent Cases, and your Profile summary. |
| My Cases | Opens your complete case history. Use this to review all cases in full. |
| FAQ | Opens the frequently asked questions list. Browse or search for answers to common issues/questions about portal processes. |
| My Profile | Located at the bottom of the sidebar. Allows you to view and manage your personal account information. |
| Sign Out | Ends your session. Always sign out when using a shared/public device. |
9. Tips for Effective Use
- Check the FAQ/Troubleshoot first, you may find an immediate answer without needing to raise a case.
- Write descriptive case titles, avoid vagueness. Think of it as the subject line of an important email.
- Use the Description field fully, the more detail you provide the faster the support team can act.
- Attach evidence such as screenshots or log files, these can significantly reduce back-and-forth with the support team.
- Respond to Waiting for Response cases promptly if possible, this reduces delay in resolution.
- Monitor the Timeline by checking back on open cases to see if the support team has left updates.
End of HappyWired Customer Support Portal User Guide